
How to attract your ideal partner or client through your personal brand
When it comes to attracting your ideal partner or client, your personal brand plays a crucial role. Your personal brand is how you present yourself to the world, and it should communicate your values, personality, and unique strengths. Here are a few tips on how to attract your ideal partner or client through your personal brand:
Define your niche: Identify your target audience and focus on serving their specific needs. This will help you attract clients or partners who are a good fit for your brand.
Showcase your expertise: Demonstrate your skills and knowledge through your personal brand. Share your accomplishments, industry insights, and thought leadership to position yourself as an expert in your field.
Build trust: Consistency is key when it comes to building trust. Your personal brand should be consistent across all channels, from your website and social media to your in-person interactions. This consistency will help build trust and credibility with potential partners or clients.
Be authentic: Your personal brand should be a reflection of who you are. Don't try to be someone you're not. Authenticity is key when it comes to building strong relationships with clients or partners.
Create a strong visual brand: Your personal brand should have a strong visual identity that reflects your personality and values. This includes your logo, color scheme, and overall design aesthetic.
By following these tips, you can create a personal brand that attracts your ideal partner or client. Remember, your personal brand is not just about what you do or offer, but also who you are as a person. It's a representation of your unique strengths, values, and personality. So, take the time to craft a personal brand that truly reflects who you are and what you stand for.

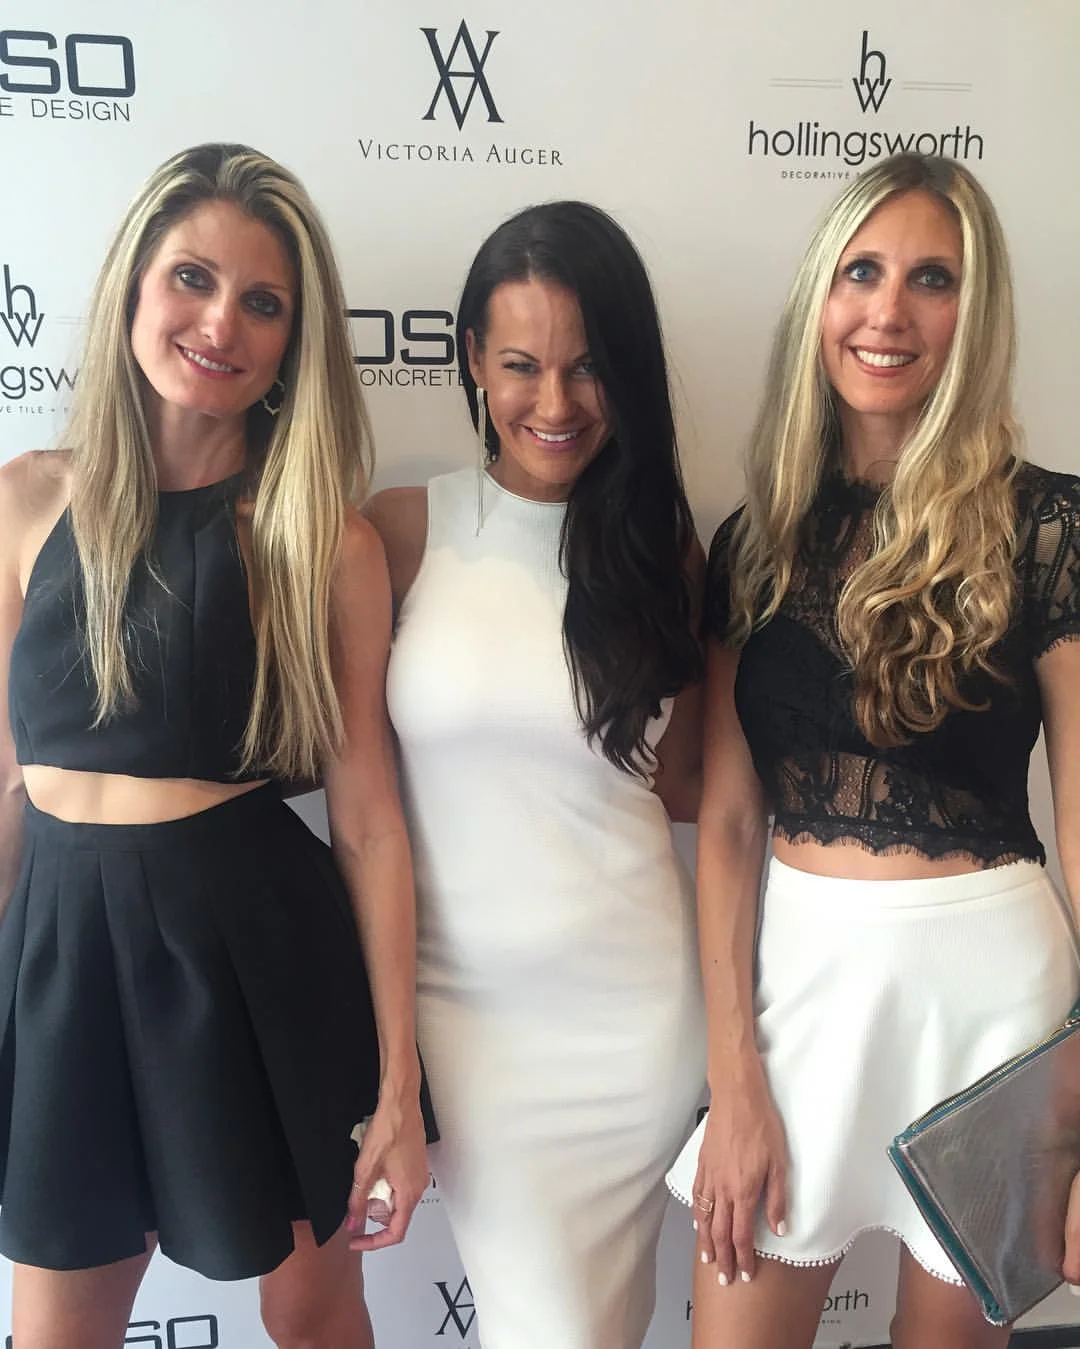
Personal Brand Photography: Elevating Your Brand Image
At the heart of every successful brand is a clear and compelling message. This message serves as the foundation for all marketing efforts, shaping the way customers perceive and interact with your business. However, conveying this message effectively requires more than just catchy slogans and flashy ads. It requires a visual representation of your brand that captures its essence and communicates it to your audience. This is where personal brand photography comes in.
Personal brand photography is the art of creating visual content that represents your brand and helps you connect with your audience on a deeper level. It involves capturing the essence of your brand through images that showcase your personality, values, and style. From headshots to lifestyle images, personal brand photography covers a range of styles and formats that can be customized to suit your specific needs.
Why Personal Brand Photography Matters
In today's digital world, first impressions matter more than ever. With consumers bombarded by a never-ending stream of content, it's essential to stand out from the crowd and make a lasting impression. Personal brand photography helps you do just that by creating a visual representation of your brand that speaks to your audience and sets you apart from the competition.
By investing in personal brand photography, you're not only enhancing your brand image but also building trust with your audience. People want to do business with people they know, like, and trust, and personal brand photography helps you achieve that by showcasing your personality and values. When your audience sees the person behind the brand, they're more likely to feel a personal connection and develop a sense of loyalty.
How to Get Started with Personal Brand Photography
Getting started with personal brand photography is easier than you might think. Here are some tips to help you get started:
Define Your Brand Message: Before you start taking photos, it's essential to define your brand message. What do you want to convey to your audience, and how do you want to be perceived? Your brand message should be at the heart of your personal brand photography.
Choose a Style: Personal brand photography covers a range of styles, from headshots to lifestyle images. Think about the type of images that best represent your brand and align with your brand message.
Find a Photographer: Once you've defined your brand message and chosen a style, it's time to find a photographer. Look for someone with experience in personal brand photography and a portfolio that aligns with your vision.
Plan Your Shoot: Work with your photographer to plan your shoot, including the location, outfits, and props. The more planning you do, the more successful your shoot will be.
Use Your Images: Once you've received your images, use them across all your marketing channels, including your website, social media, and email marketing. Your personal brand photography should be an integral part of your overall branding strategy.
The Benefits of Personal Brand Photography
Investing in personal brand photography can have a range of benefits for your business, including:
Enhancing Your Brand Image: Personal brand photography helps you create a visual representation of your brand that showcases your personality, values, and style.
Building Trust: By showcasing the person behind the brand, personal brand photography helps you build trust with your audience and develop a sense of loyalty.
Standing Out: In a crowded market, personal brand photography helps you stand out from the competition and make a lasting impression.
Creating Consistency: Personal brand photography ensures consistency across all your marketing channels, helping you create a cohesive brand image.
Connecting with Your Audience: By creating images that resonate with your audience, personal brand photography helps you connect with them on a deeper level and build lasting relationships.
In Conclusion
Personal brand photography is a powerful tool that can help you elevate your brand image, build
How Personal Brand Photography Can Help Elevate Your Online Presence
How Personal Brand Photography Can Help Elevate Your Online Presence
In today's digital age, having a strong online presence is crucial for personal and professional success. One way to achieve this is through personal brand photography, which can help elevate your brand and make you stand out from the competition. In this blog post, we'll explore the benefits of personal brand photography and how it can help improve your online presence.
What is Personal Brand Photography?
Personal brand photography is a type of photography that focuses on capturing images of individuals that represent their brand or identity. It involves working with a photographer to create a series of images that convey your brand's message and values.
The Benefits of Personal Brand Photography
Having professional, high-quality images on your website and social media platforms can help you establish credibility and trust with potential clients. Additionally, personal brand photography can help you:
Stand out from the competition: In today's oversaturated market, having unique and eye-catching visuals can help you get noticed and remembered by potential clients.
Connect with your audience: Personal brand photography can help you showcase your personality and values, which can help you connect with your audience on a deeper level.
Increase conversions: By showcasing your brand's story and values through personal brand photography, you can help potential clients understand your mission and feel more compelled to work with you.
How to prepare for your personal brand photography session
To get the most out of your personal brand photography session, it's important to prepare ahead of time. Here are a few tips to help you get started:
Define your brand's message and values: Before your photography session, take some time to think about what your brand stands for and the message you want to convey.
Choose your outfits and props: Select outfits and props that align with your brand's message and values. This will help create a cohesive look and feel throughout your images.
Choose the right location: Select a location that aligns with your brand's message and values. This can be a studio, outdoor location, or even your own workspace.
Conclusion:
Investing in personal brand photography can be a game-changer for your online presence. By working with a photographer to capture professional, high-quality images that showcase your brand's message and values, you can help establish credibility and trust with potential clients, stand out from the competition, and increase conversions. So, why not give it a try and see how personal brand photography can help elevate your brand and take your online presence to the next level?
Swipe right! Tips for getting stand-out photos for dating apps!
Dating app photos. What you need to know!
As both a photographer and someone who has navigated the dating market in major cities including New York, London and Miami, I have swiped on hundreds (thousands?!) of photos!
And without a doubt, the vast majority of people are selling themselves short and could use major help up-leveling their photos in their quest for love!
You don’t have to be the hottest, youngest or most stylish. Honestly, just having clean, clear and high-end photos will immediately set you apart!
Here are my favorite tips if you’re out navigating the dating world - or are a photographer helping clients get the best possible images!
the must have photos:
Your main image should be a headshot with a warm, friendly smile. Look approachable!
You’ll need a variety of photos. Most sites require at least 6.
The swipe-stopping headshot
Your main photo should be a clean and clear headshot looking straight into the camera preferably with a warm smile!
A full body shot
Preferably two. Make sure they accurately represent how you currently look .
A lifestyle shot
A photograph that gives us something personal.
A conversation starter
I’m a big fan of a photo that is a conversation starter, example you with your pet or in a unique location.
more tips:
Use natural light.
No overly formal, studio shots or photos that look like they belong on LinkedIn.
It’s a good idea to have your hair and makeup professionally done but in a natural way to represents the best version of you! At the least, get a great blow-out at a dry bar!
Look friendly and approachable.
Studies show that the color red really grabs attention! I personally love white and it’s worked well for me.
Have a variety of looks. Casual with jeans and something that’s a bit more dressy.
Use the “caption” option on the apps to give some context to the photo and let people know WHEN it was taken! 👉🏼
Pay attention to the background and location. It says a lot about who you are and what kind of lifestyle you live. That means no bathroom selfies!

Heading out to dinner in the West Village, July 2021
what not to do:
Don’t misrepresent yourself. That means photos that are too old, too edited or don’t accurately show what you currently look like.
No group shots or photos of you with other people!
No overly-edited selfies.
No sunglasses or hats that cast a shadow or don’t show your eyes.
No photos of with your ex cut out of the picture!
On the topic of ex’s, it’s also a good idea not to use a photo that your ex took of you or was taken while you were away together. I had an ex use photos that I took on a very special day we celebrated together and it was extremely painful to see when I came across them online. I don’t care how fabulous you look, it’s just not good energy! Be kind and respectful by starting fresh!
Ladies,
Men prefer photos that are friendly with a warm smile!
They don’t love overly edited selfies, anything that looks too intimidating and definitely no snapchat filters or duckfaces!
If you’re looking to attract a high-quality man, don’t use anything too overtly sexy! It’s ok to look HOT (men are, of course, visual creatures) but you shouldn’t lead with your sexuality!
Please have at least one full body shot (preferably 2) that accurately represent your current weight. I believe that we judge ourselves far more harshly than men! But they also don’t want to be cat-fished.
Make sure your photos are recent and are actually OF you! You may think this is obvious however, I have personally met a man who used a photo of someone else and a male friend once met a lady who used her daughter’s image! 🤦🏻♀️
Guys,
Make sure you are properly groomed before you take photos! So many men lately look like they are in desperate need of a haircut or shave.
I personally love a man with some facial hair but it should look intentional and not like you’ve given up on life!
I’m NOT a fan of tank-tops for men UNLESS it’s a shot of you running in a marathon or race where it makes sense and is giving some insight into your life.
No shirtless gym or bathroom selfies! Just no. Full stop.
As a matter of fact no photos taken in the bathroom, gym or car at all!
First impressions matter and most people spend less than a second deciding if they will swipe right or left! Since I’ve up-leveled my photographs, the quality of men of I attract and how they show up to our dates has significantly improved! I’ve had several men tell me that they felt like they needed to up their game before they met me and I am here for that!
I’d love to know, what would YOU add to this list? Let me know in the comments below!
Testimonials

“Heidi is the most amazing photographer.
I’ve never had a good photograph taken of me in my life. When I received Heidi’s proofs I was so happy I didn’t know which ones to choose! A photoshoot with Heidi is the best gift you will ever give yourself.”
“She is awesome. Really knows what she is doing. Very professional, creative, and smart. Knows how to make you shine.”
“She makes you feel so comfortable and cared for! Even if you feel awkward in front of the camera she will having you laughing during your entire shoot and you’ll get the most natural photos!”

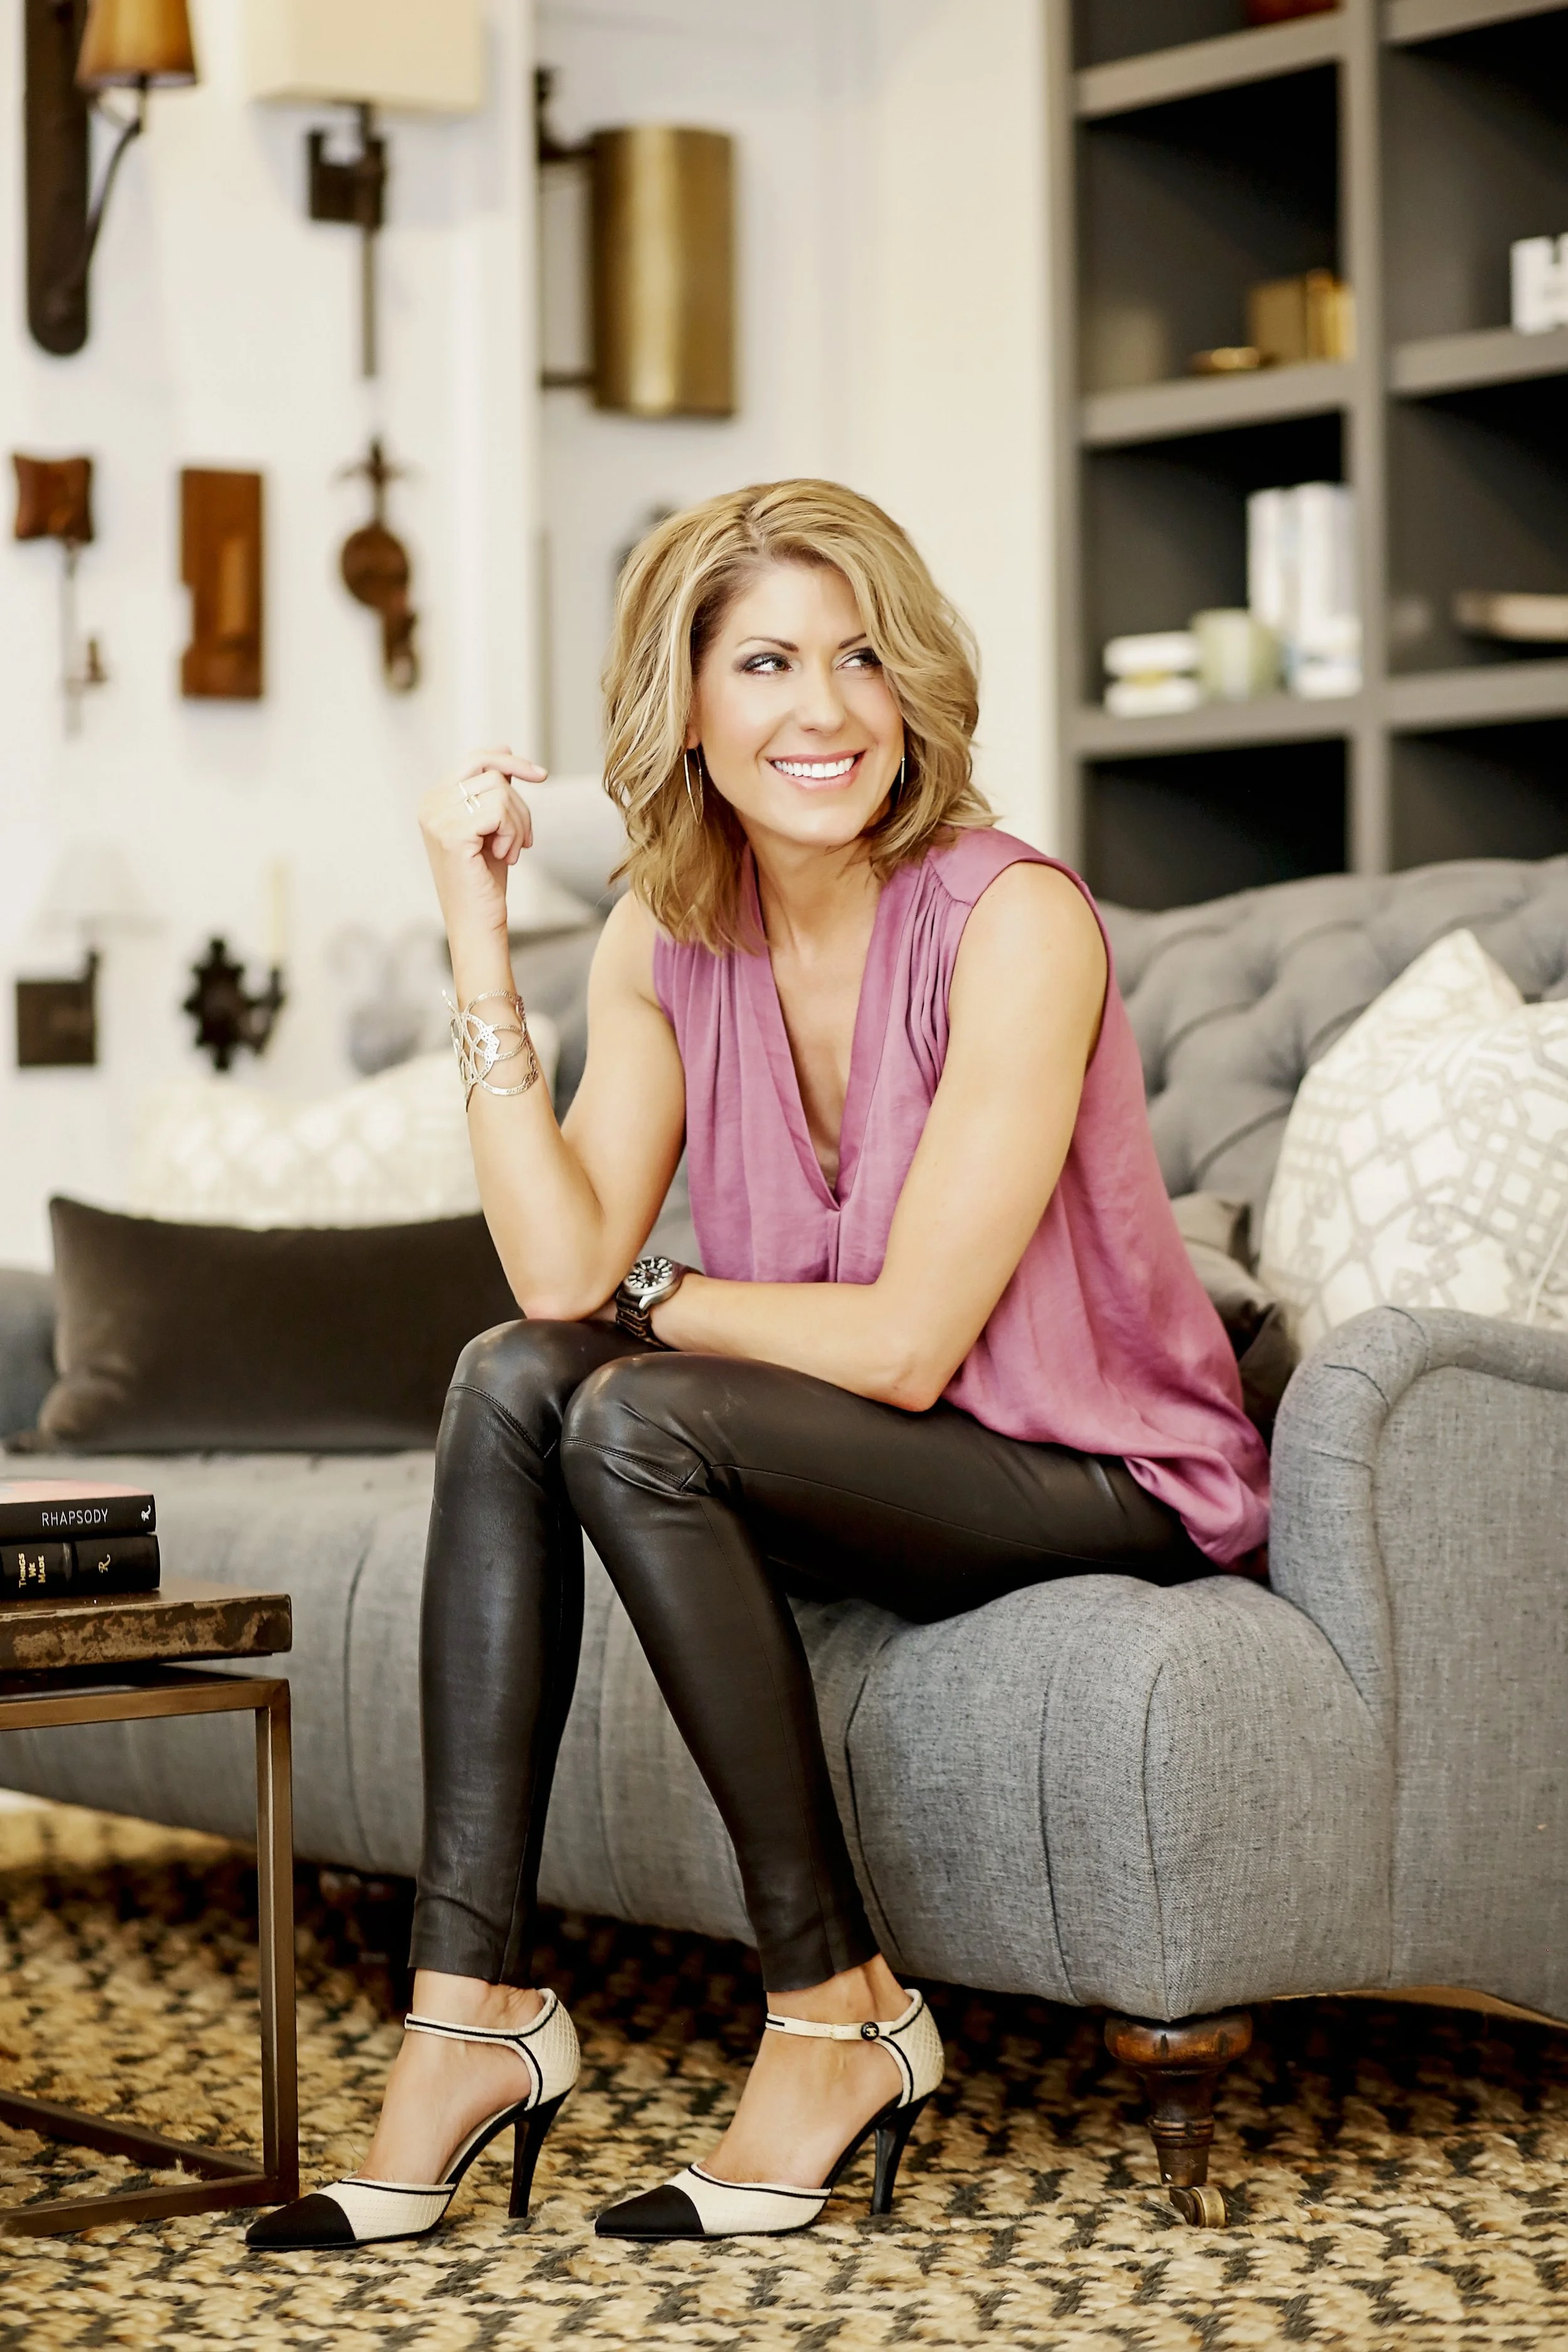
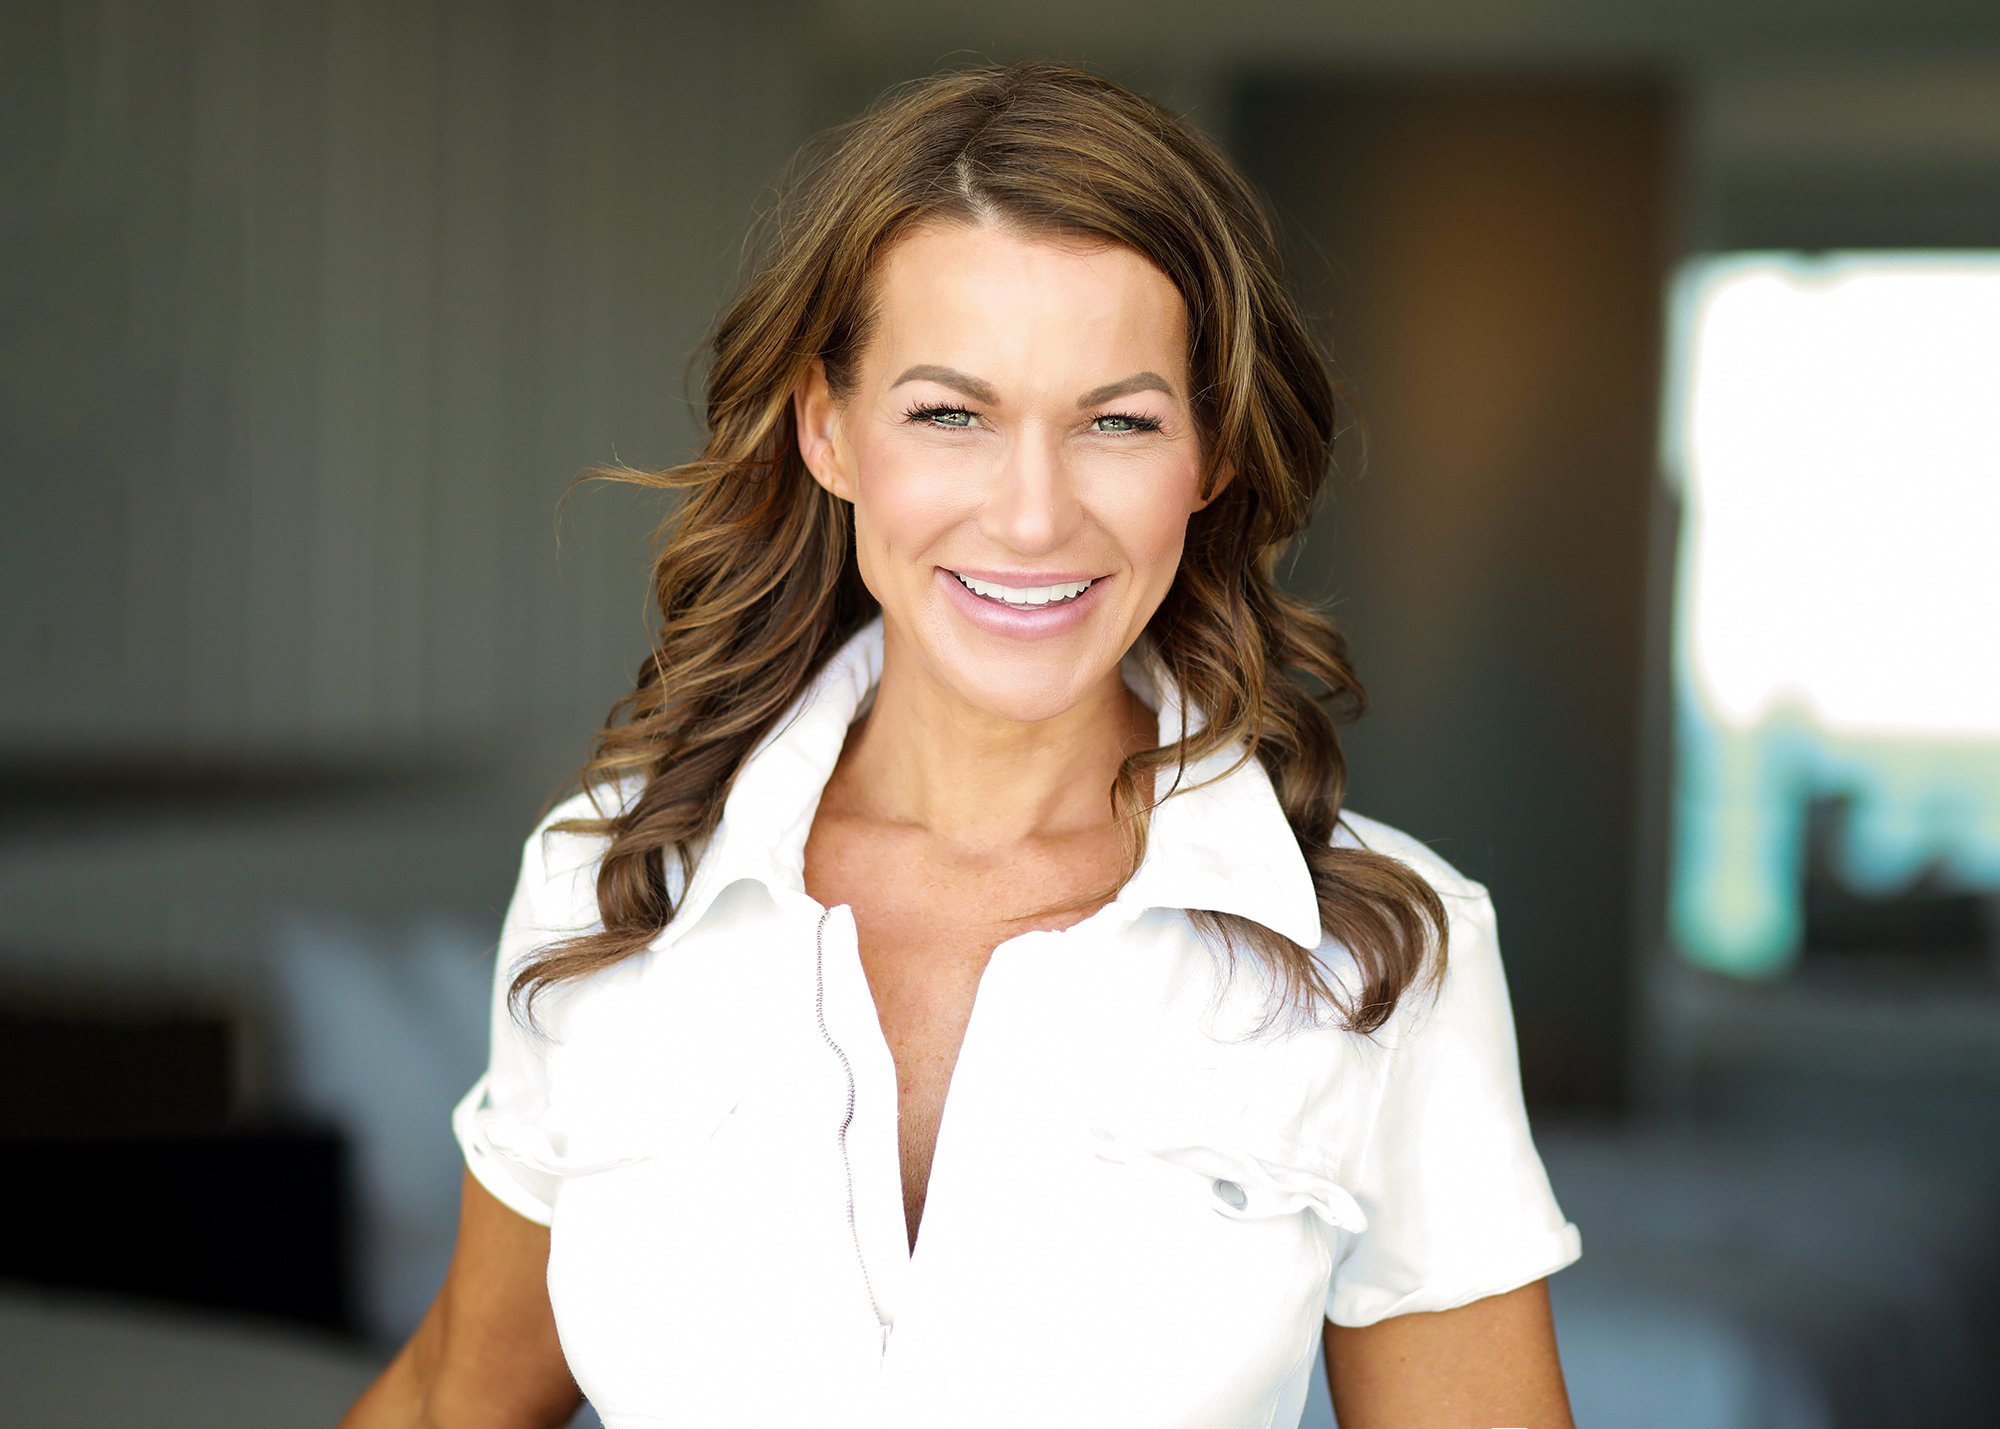
What is a personal brand photography session?
A personal brand photography session is a professional photo shoot that is tailored to creating images that reflect the personal brand of an individual. These images can be used for a variety of purposes, such as on a personal website, social media profiles, business cards, marketing materials, or in other personal or professional contexts. The goal of a personal brand photography session is to create images that accurately convey an individual's unique personality, style, and message to their target audience. This often includes wardrobe, makeup and hair styling, as well as location scouting and posing guidance by the photographer to ensure the final product is visually consistent and effective in promoting the brand.

How to use your personal brand photography images
There are many ways to use personal brand photography images, depending on the context and goals of your brand. Here are a few examples:
Social media: Use images from your personal brand photography session as your profile picture and cover photo on your social media accounts to create a consistent and professional image across all platforms.
Website: Use images from your personal brand photography session on your personal or professional website to create a more personal and engaging experience for your visitors.
Marketing materials: Use images from your personal brand photography session in marketing materials such as brochures, flyers, and business cards to create a strong visual identity for your brand.
Speaking engagements: Use images from your personal brand photography session in any presentation or material related to speaking engagement, this will help to create trust and credibility with your audience.
Online course or e-book: Use images from your personal brand photography session in your online course or e-book to create a more engaging and personal experience for your students or readers.
Print or digital media publication: Use images from your personal brand photography session in any print or digital media, such as magazine, newspaper, online blogs and such, where you are featured or have contributed an article.
It's important to remember that the main goal of your personal brand photography is to create images that accurately reflect your brand personality, style, and message, and that can be used across various mediums to promote your brand.

5 Myths about Personal Branding Photoshoots
5 Myths About Personal Branding Photoshoots
Drool-worthy personal branding photos are not as unattainable as you might think. If you tell yourself that you don’t need photos of you on your website because your words speak for themselves, or if you think that you can attract the clients of your dreams with that headshot taken back in 2008 at your corporate job (or worse, the one you put up after you cropped out an old boyfriend), I’ve got some news.
Bottom line? Your ideal clients want to get to know, like, and trust you—and they can’t do that if they can’t see your face. I’m here to bust the top five myths I come across as a personal branding photographer. Here goes:
You Need to Be Photogenic
This must be the number-one myth perpetuated about personal branding photography. When you see branding photos of people who look as though they were meant to be in front of the camera, most of the time it’s more about how the photographer has made the subject feel than any innate ability of the person to look good on camera. A good brand photographer will know how to make you FEEL comfortable—and LOOK comfortable. Pinky swear.
I adore the process of getting to know my clients and helping them to loosen up during our shoot. You might be surprised to learn that almost EVERYONE is uncomfortable in front of the camera, no matter how many times they’ve done it. But with a few good tips and some laughs, even the most awkward among us can find her inner RAWR.
You Need to Spend a LOT of Money
If you think you need to spend a fortune scouting the perfect location for your photoshoot, splurging on a high-end wardrobe, and hiring an entourage to keep you looking your best all day—not to mention the bucks it takes to pay the photographer—you’re mistaken.
Sure, you’ll want to hire a GOOD photographer (and not just your cousin’s friend who “takes photos on the side”), but that should be the bulk of your expenses. You don’t need to jetset off to Paris to be in the “perfect” location. You don’t need to wear Prada and Louboutins. And you don’t need five people following you around all day to make sure your collar is never out of place.
Your photographer will handle most of the details. Get a good pedicure and manicure. Have your hair and makeup done (this might be included). Maybe get a spray tan if you like how it looks. Don’t spend an arm and a leg on clothing. No one will know what brand you are wearing. Cheap clothing looks just as good as expensive clothing on camera.
And don’t worry about a fancy location. Talk to your photographer about what look you’re going for. They may have the perfect location in mind. The simplest of places can make an image look amazing through the lens. Don’t stress that you can’t do your photoshoot in Italy. You don’t need to. (But if you’re already going to be in Italy, well, go for it!)
You’re Too Old/Shy/Fat/Boring/Weird to Be the Face of Your Brand
Imposter syndrome anyone? Does it seem like everything has already been done? When you scroll through Instagram, does your life feel SO BORING? Darling, EVERYONE’s life is packed with mundane, pajama-clad moments, one after the other. And EVERYONE can find simple moments that can be made to look fabulous.
You have a fire within you. You just need permission to find it. What are you passionate about? What infuriates you about your industry? What are you trying to change? Channel that energy, and I promise you, you will be JUST as interesting as those lives you scroll past on social media.
Personal Branding Is for Extroverts
If your favorite place to be on Friday night is curled up with a book, catching up with your favorite blogs, working on your brand, or out with a close girlfriend or two for wine and tapas to talk it up, you might be an introvert—and the idea of plastering your face across your website might make you feel nauseated. Honey, you might not believe this, but I am just like you. And SO MANY of my clients are too.
But you know what? When you hide your face from potential clients, they don’t get a chance to get to know you. People process photos 60,000 times faster than they do words. 60,000 times! And they will connect with your words so much better if they can see who is behind them. Your people want to see you. So get out from behind-the-scenes. It’s time to shine.
Product-Based Businesses Don’t Need a Personal Brand
“I don’t want to distract my customers from my products by putting my face on my brand.” I hear this a lot, and it makes me cringe. People don’t interact with brands. They interact with people. Even the most automated brands are run by people who make decisions on a daily basis that affect their customers. The more you can step in front of your customers and get to know them, the more they will trust your products.
After busting these myths with me, how do you feel? Now you have no excuse to step into the limelight. It’s your time, I just know it.
Last Minute Event Style Tips
One of the biggest struggles women entrepreneurs have is knowing what to do when it's time to ditch the yoga pants and actually be seen out in public! 😳 The horror, right? My clients often share that they've been invited to events (sometimes at the very last minute) and ended up turning them down because they didn't know what to wear.
Since getting out and networking is almost always good for business, I don't want fear, frustration or just plain being fed up to get in your way.
Here's a few last minute tips I put together to help you out in a pinch:
1. Super simple style tip: When choosing an outfit, you can’t go wrong if you stick to one solid color from top to bottom. It's figure flattering, flows beautifully and looks great in photos. My personal fav? A one piece fitted dress.
2. Keep a pair of comfortable nude, platform shoes on hand. Not only does the platform make them easier to walk in, they’ll make your legs look miles long. Plus, they match everything.
3. Get a professional blow-dry for your hair. A good hair day makes everyone feel better. They have "blow bar" salons in almost every city now and most take walk-ins.
For the love of all things holy. If it’s raining, don’t risk arriving looking like a drenched rat......or in my case cave-woman hair. Pull your hair back in a sleek pony or have someone style it for you. I’m a huge fan of these adorable little side buns my friend Kellie can do. I haven’t quite mastered it myself yet was a lifesaver for me when I had to attend an event during a Florida downpour.
4. If you have a few days warning and you really want something fabulous, consider renting your outfit from Rent-the-Runway. Once a photo of you in that red dress is posted all over Facebook, you’re probably not going to want to wear it in public again anyway. You can order designer styles right from the comfort of your own couch (or in bed while binge watching House of Cards episodes) and have it shipped to your doorstep within a few days. They even take care of the dry cleaning. #score
5. Don't be a poser - EXCEPT in front of a camera. ;) Learn the proper way to stand in a photo. One foot slightly back, the other out in front & slightly turned can really slim the body. Watch the way the stars on the red-carpet do it and then practice in front of the mirror. Even better, have someone take a few test shots of you know exactly what to do for the real thing.
6. A few too many crumbs on your keyboard and a few too miles on your treadmill? I feel your pain. Spanx can be a girl's temporary best friend. I ❤️ them.......almost as much as I do my chips and spicy hummus.
7. Positioning. It's not just for brands. Know where *you* look best in a photo. You will RARELY find a photo of me where I am not in the middle. Do I have some sort of a “look at me" ego problem? No, but I do have some boobs. Are you with me C+ cup ladies? If I'm standing sideways in a photo I just look pregnant. Yuck. So, I’ll pretty much knock everyone around me out of the way so I have a center spot. My friends all know this and are willing to indulge me. 😉
8. Keep your chin SLIGHTLY down. You don’t want people looking up your nose.
9. Use it then lose it. Take off the unsightly name tags. I personally LOVE name tags, mostly because I really suck at remembering people's names, but they don’t look so hot in photos. So lose them when the camera comes around.
10. Red, red, wine....🍷🍷 Don’t drink red wine or your teeth will look grey in photos. I know. I hate this too especially because Cab is my beverage of choice on those rare nights I actually DO out. So here's how I get around that: I drink red wine but only AFTER the cameras have been put away. Before that I stick to something clear.
Pet Peeve: When you're taking a group photo...ESPECIALLY when you bump into a celeb at an event don't take the same darn photo with everyone's phone!
Please give everyone a break and use ONE phone then TEXT the photo to the rest of the people in your group. People will definitely like you more because of it. 😉
Looking for more tips, tricks or ideas to keep you camera confident and ready? My 10 Tips to Look Better in Photos will help you! Click the link below and download now!
10 Photoshoot Prep Tips
What should you wear to your shoot? As a general rule, form-fitting outfits photograph better than loose clothing and solid colors photograph better than prints, so if you DO want to wear a pattern try to keep it to a minimum.
What NOT to wear? Loose fitting clothes, too many layers, things that need to be tucked in, anything shiny, capped sleeves, clothes with words or logos - unless you are *specifically* using the words to send a message.
You don’t need expensive clothes. The camera can’t see quality. I’ve had clients buy gorgeous dresses on Amazon for less than $30 and look like a million bucks. You can also RENT fabulous outfits from online sites like Rent the Runway. Shoes? 98 percent of my clients kick theirs off and go barefoot. So spend your money on a pedicure not a new pair of pumps.
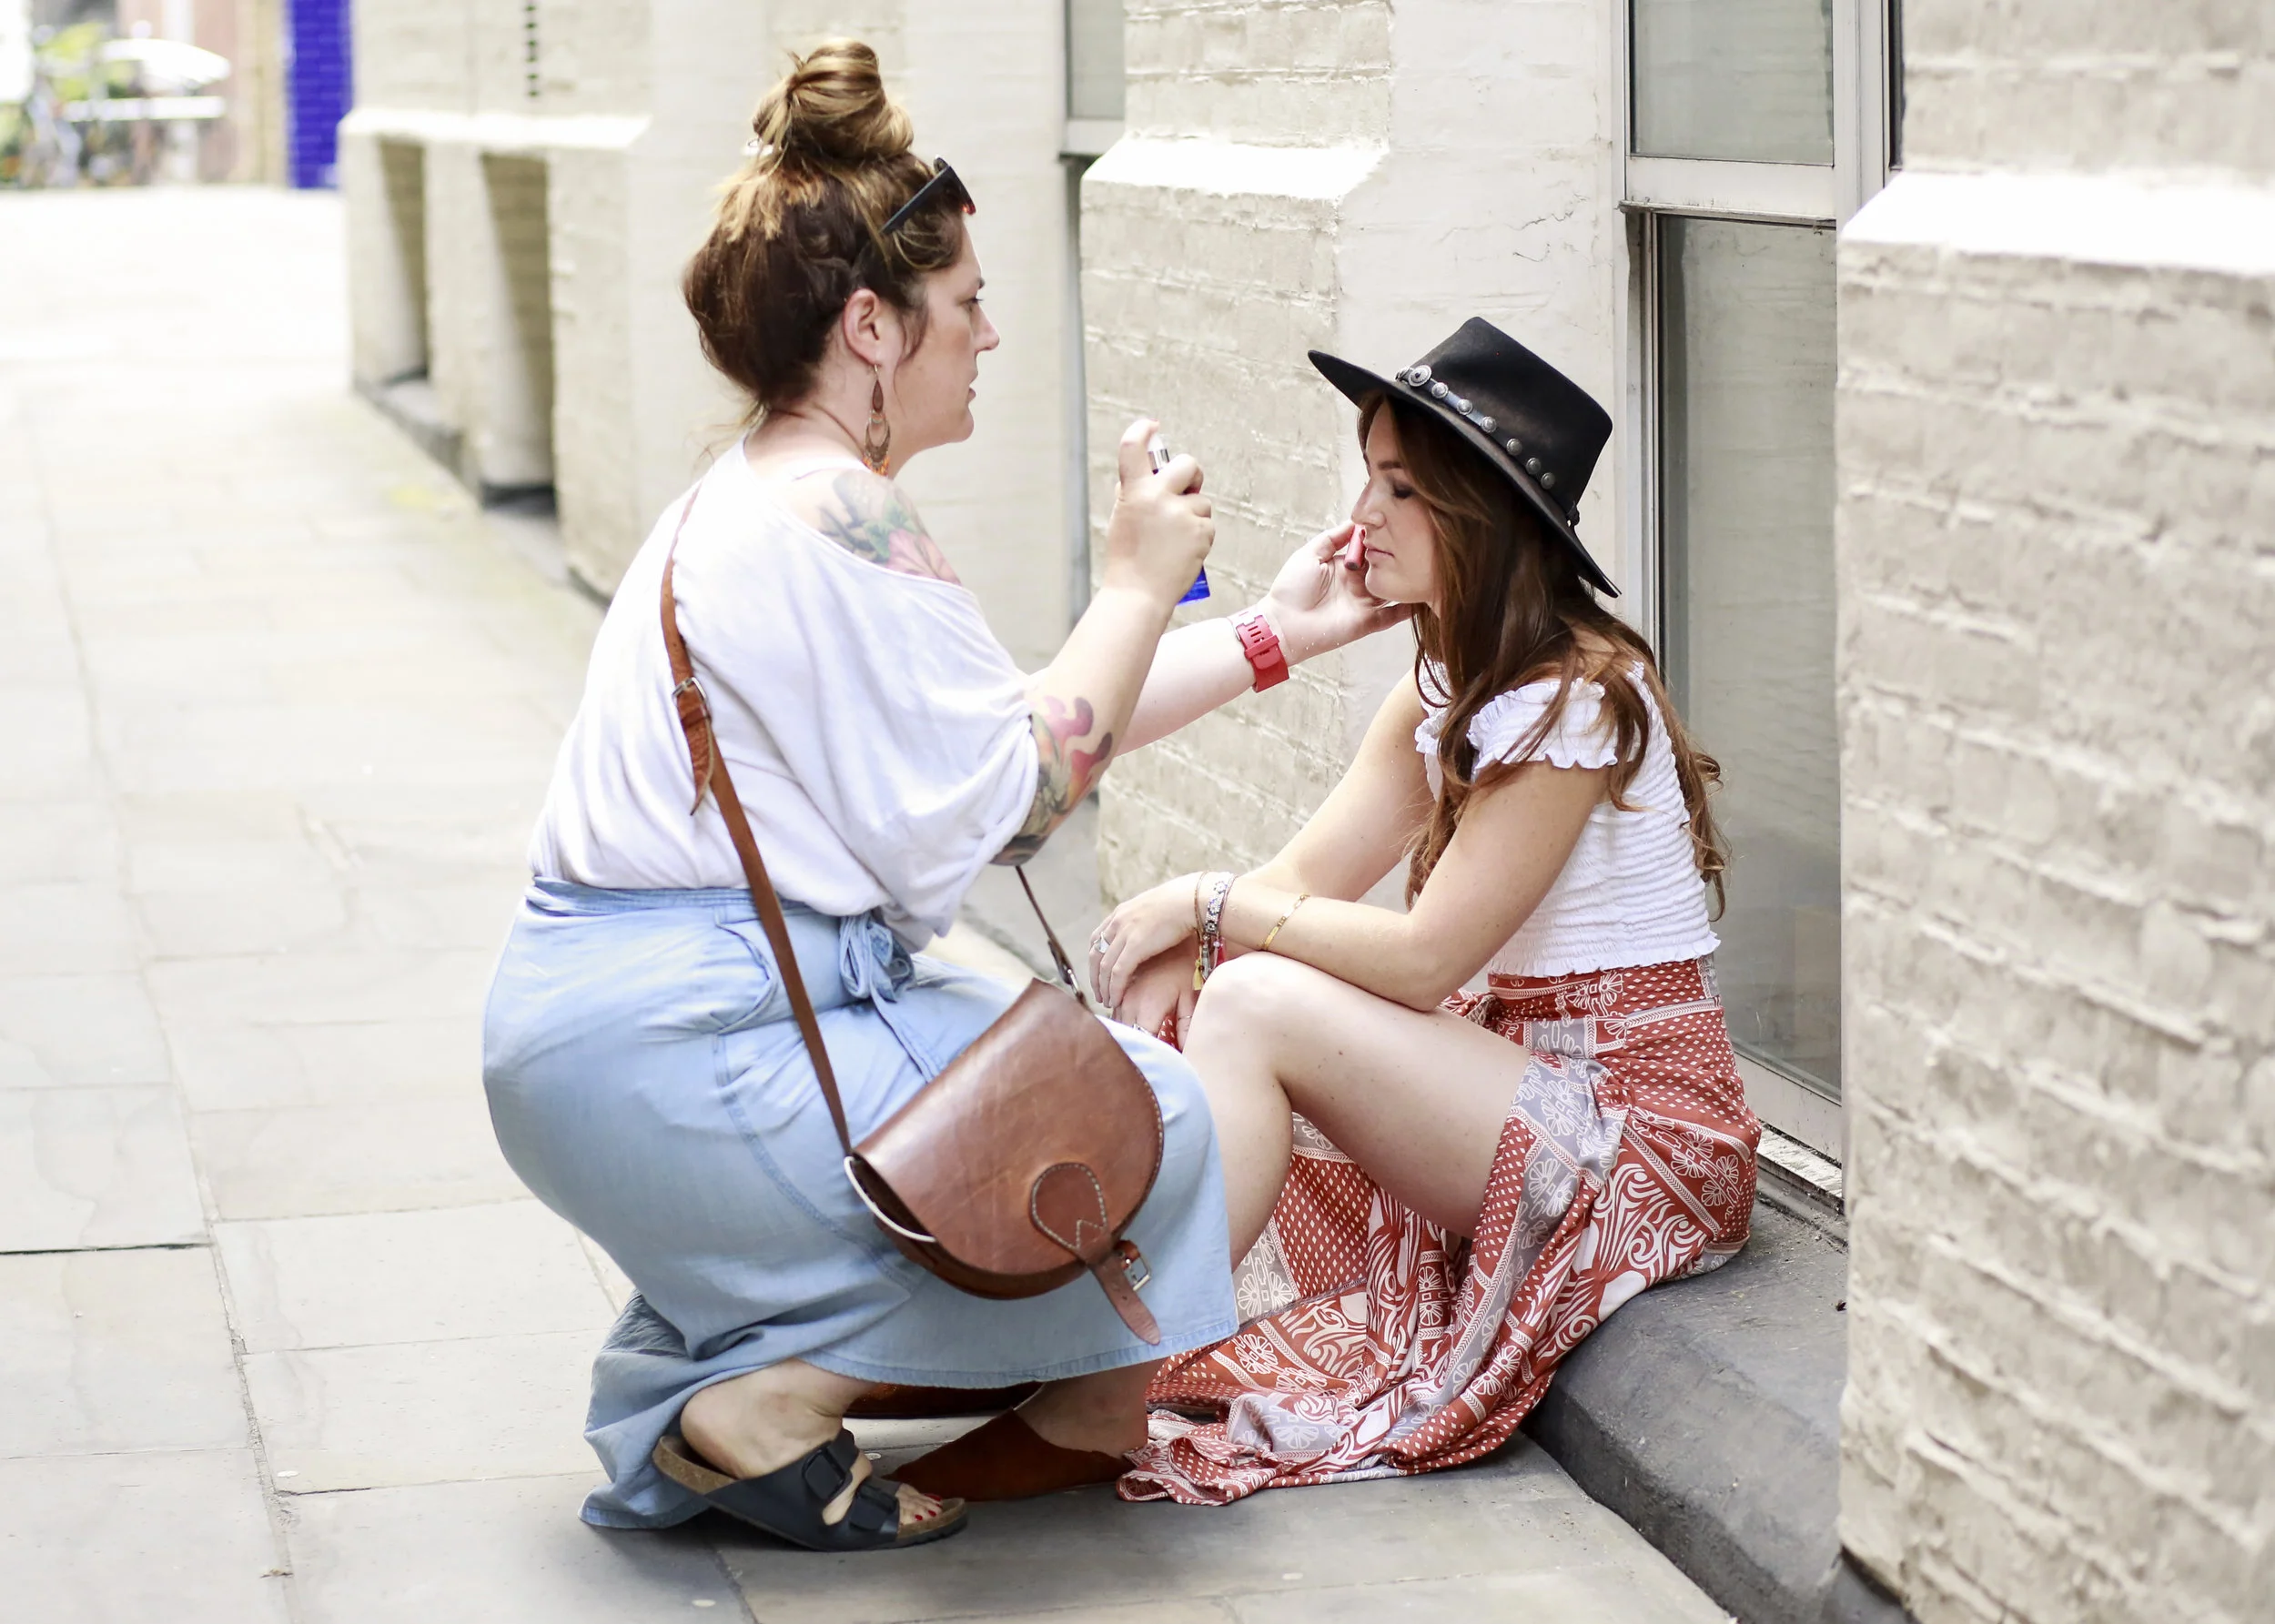
Hair & makeup? Go Pro. Hire a professional. It’s worth every. single. penny. Be sure this person is trained in hair and makeup for photoshoots. I found my first pro artist by doing a simple google search. The best part? They’ll come right to YOU so no need for a trip to the salon. You can expect this to cost about $150 depending on where in the country you live. It will be some of the best money you've ever spent.
Determine *where* you’ll need photos. Make a list of every spot you could potentially need a photo. LinkedIn? An upcoming press release? Do you have a blog where you share your favorite recipes? This may be a great spot to have a photo of you prepping food. Share this list with your photographer so you don’t forget anything the day of your shoot.
Explain to your photographer that you’ll need HORIZONTAL photos! Web designers have told me one of the biggest frustrations they have is not enough horizontal shots to work with when designing a site.
Bring a playlist with your favorite music on the day of your shoot on your smartphone. You can carry it around with you and it will definitely help set the mood.
Stay away from salt, alcohol, dairy and processed foods the week before your shoot to help prevent puffiness and breakouts. But do eat a healthy breakfast the morning of the shoot & bring some snacks with you! Most of the time pimples can be photoshopped out but if you DO end up with a giant cyst call your derm and they can give you a cortisone shot and knock that sucker out!
Moisturize like CRAZY the week before your shoot…both the inside and
outside of your body. You can work on the inside by drinking loads of waterUse Props in your shoot. Props are fabulous for a number of reasons. Firstly, it can be super awkward to have your photos taken. Having a something to DO with your hands can take some of the pressure off. Additionally, props make your photo feel more like a story. They give the viewer an idea of what it might be like to work with you behind the scenes.

How to get Instagram worthy travel pics!

You spend months planning your trip and imagine yourself posting gorgeous shots all over social media, becoming the envy of all your friends! You even screen-shot your favorite influencers looking trés chic in front of a favorite Parisian hotspot or eating gelato in front of the Trevi Fountain. But when you actually get there you find it’s anything but glamorous! The streets are overcrowded and people are pushing each other out of the way. You leave feeling frustrated and like a first-class Pinterest fail.
Don’t be too tough on yourself! Those epic shots usually take a LOT more work than you realize!
Here are some of my favorite tips to get influencer worthy travel pics:
Do your research. Visit locations before you shoot so you can assess crowds, check lighting, and determine which time of day will be best to capture that dream shot. As a general rule, golden hour (that time just around sunset) makes for the prettiest light but if you’re shooting at an indoor location you may want to visit when there’s more natural light pouring in through the windows. If I have a location in mind, I’ll often visit several times in one day so I can properly assess the situation. If the location requires a ticket, be sure to purchase ahead of time on-line to avoid the queue.
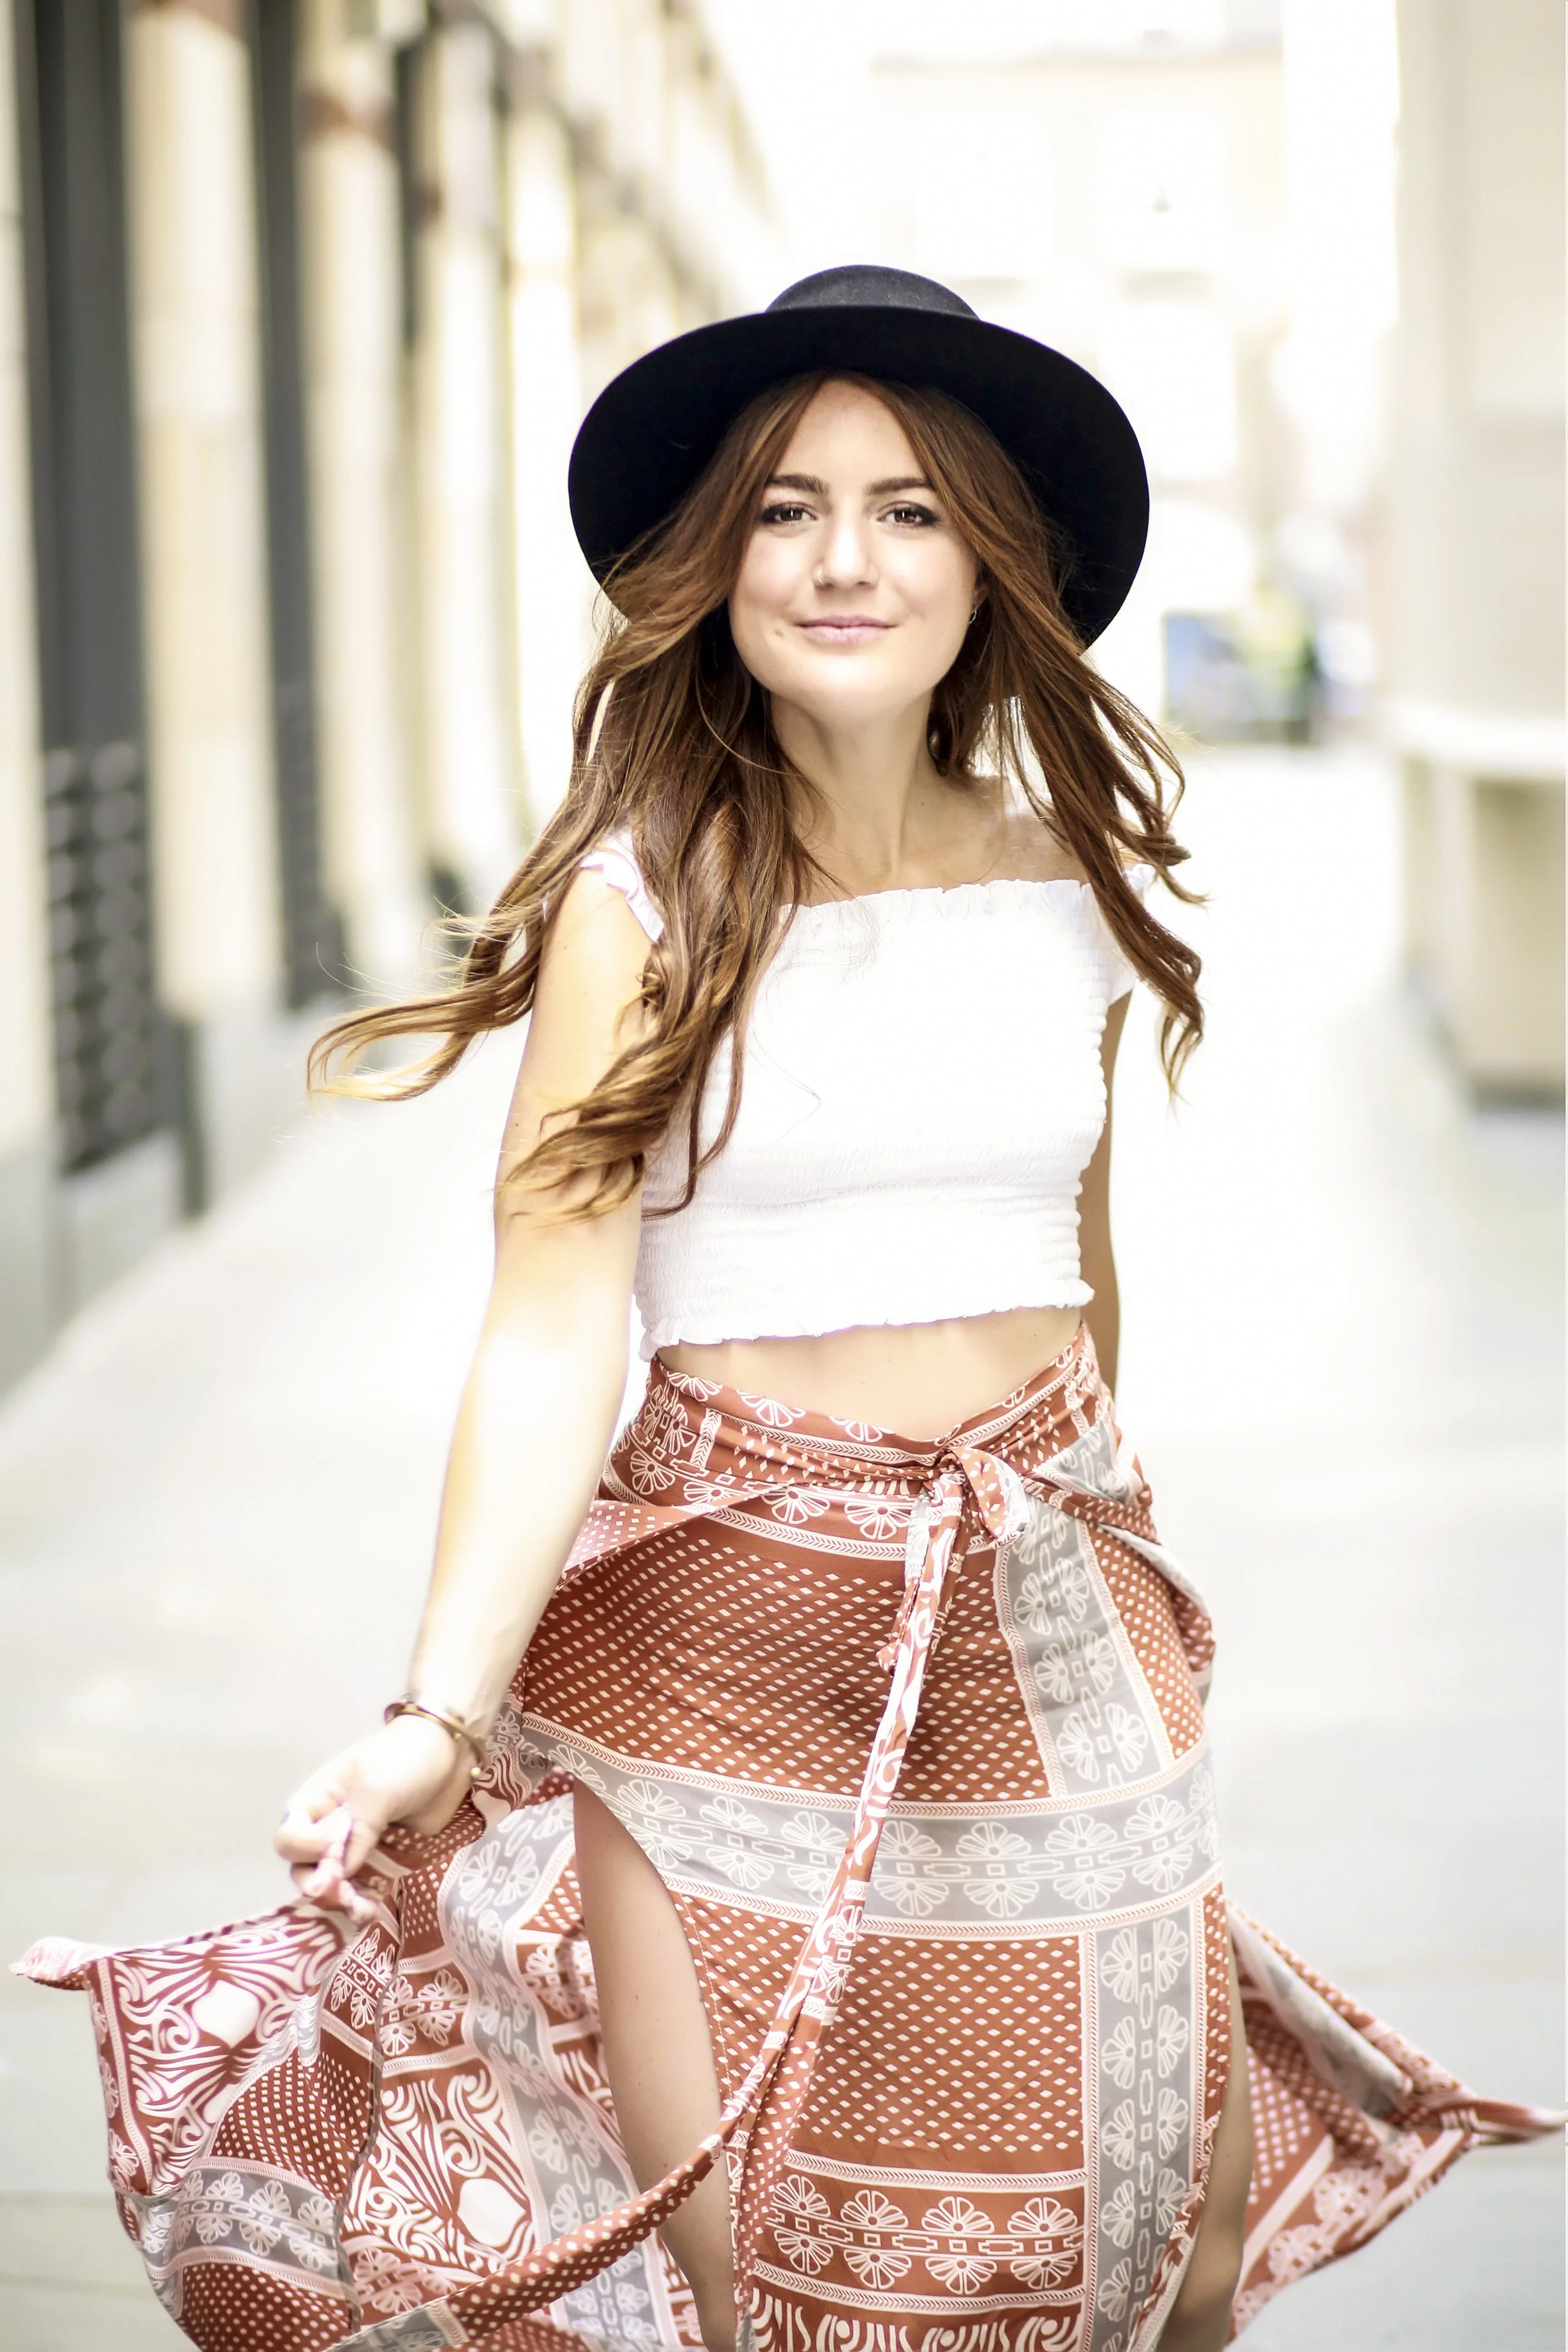
Plan Your Outfits! Know the colors of the location where you’ll be shooting at so you can coordinate your outfits ahead of time! Leave the workout clothes at home and wear a fabulous sundress instead! Throw on a cute hat and sunglasses for that instant “travel glam” factor!
Show some movement in your photos!
A long skirt or sundress is an easy way to start! A cute hat is another way to get that chic-travel blogger look!
Go-Pro! And, I don’t mean with your camera. If you really want to make the most of your travel pics, invest in pro hair and makeup the day of the shoot. Have the stylist come straight to your hotel or airbnb one morning and then head out on the town to capture your images. If you’re on a budget, in many cities you can still get a shampoo & blow-dry for less than $20. It will make a world of difference in your photos!
Show movement! Don’t just stand there staring at the camera like a typical tourist! Instead, show some MOVEMENT in your images! Tell a story by interacting with your surroundings. Invite the viewer in with your eyes and smile! Practice your walk, twirling your skirt and laughing at the camera so you know how you look best!
Act Quickly! If you’re shooting at a popular tourist spot there will most likely be crowds so you’ll need to act FAST. Sometimes you’ll only have a few seconds to get your shot in before you're shooed out of the way or asked to leave. That’s why practicing (as mentioned above) is super important!
Quick Change. If you'll need to change outfits, wear bike shorts and a tube top under your clothes so you don't have to run and hide or use a dirty bathroom.
Hire an “Instagram Boyfriend” Even if you’re a photographer yourself, consider hiring a local guide! Airbnb has local “experiences” where you can hire “travel photographer” or “instagram boyfriend” for a few hours. They are extremely reasonably priced and well worth the small investment. I do this in many of the cities I visit, since these guides know where the beautiful, off-the-beaten path spots are for photos. Plus, if you’re traveling alone you’ll have someone to take YOUR pics for you!
Don’t be shy! If you’re not with a group, don’t be afraid to ask someone to take a photo of you. In my experience, your best bet will be to look for a teenage or college-aged girl! Young girls are so social media savvy. They’ll be honored to help you and will know how to compose the best images. The worst person to ask is usually someone’s dad or grandpa (sorry guys!)
Remember! Influencers often take hundreds of images to get that ONE shot you see on their instagram page so don’t be too tough on yourself! Don’t try to compete or compare yourself to them. But you CAN get the best version of YOU by spending just a little bit of time on the planning and prep!
I can’t wait to see what you create!
Ready to learn more? Want my secret to finding fabulous instagram worthy locations when I travel? Click here to find out how I do it….

How To Get Great Holiday Photos!
Don't run and hide (from the camera) this holiday season!
'Tis the "biggest party season" of the year and you don't need to be The Kardashians to get your best holiday photo game on!
Years ago, I never gave much thought to what I wore to parties - beyond "Has anyone seen me in this outfit before?" 😳
It certainly never occurred to me how my clothes would translate on camera. Since I became a photographer though, I've realized just how EASY it is to do a little pre-planning so I don't have to pretend to need another peppermint martini (or glass of champagne) every time a camera comes around!
Here are a few of my favorites:
1. Play it safe and wear a solid color that looks GREAT on you! Without the right planning, prints can really be hard to pull off in a photo.
2. But pick the RIGHT color. Jewel tones are all the rage right now and are GORGEOUS on almost everyone! They do wonders for us when we look a bit washed out - or are just plain tired from holiday planning.
From sapphire blue to ruby red there are endless options and the holiday season is the best time to pull them off! If you're a red head, girl, you already know you look AMAZING in emerald green! Blondes look incredible in deep blues and green-eyed brunettes (like me!) can rock purple like nobody's business.
3. Keep it simple. Bulky layers or shirts that need to be tucked in can look messy, wrinkled and unpolished in a photo. I tend to favor slim fitting one piece dresses that hang nicely without a lot of fuss.
4. If you'll be at a holiday party splurge on a great blow dry! Nothing makes you more camera ready than a good hair day! And for that EXTRA va-va-va voom factor pop on some fake lashes and pencil in those brows!
5. Standing almost always looks better than sitting! Unless you are properly posed, when you are sitting your clothes can bulk up and add extra pounds to your body.
6. Stay away from red wine until all of your photos have been taken or your teeth will look gray! 🍷
7. Flash is almost NEVER flattering so, if at all possible, take your photos while the sun is still out - preferably FACING a window so your face is full of natural light. This also helps smooth out the skin! ⛅️
I'm also not a fan of those small led lights that are in so many homes & businesses now. I try to turn them off whenever I can because they cast horrible shadows on your face.
8. Try different camera positions. You don't have to get everyone's full body in the photo - personally, I prefer shots from the waist up with a little more connection between the subjects. Shoot horizontally and not just vertically!
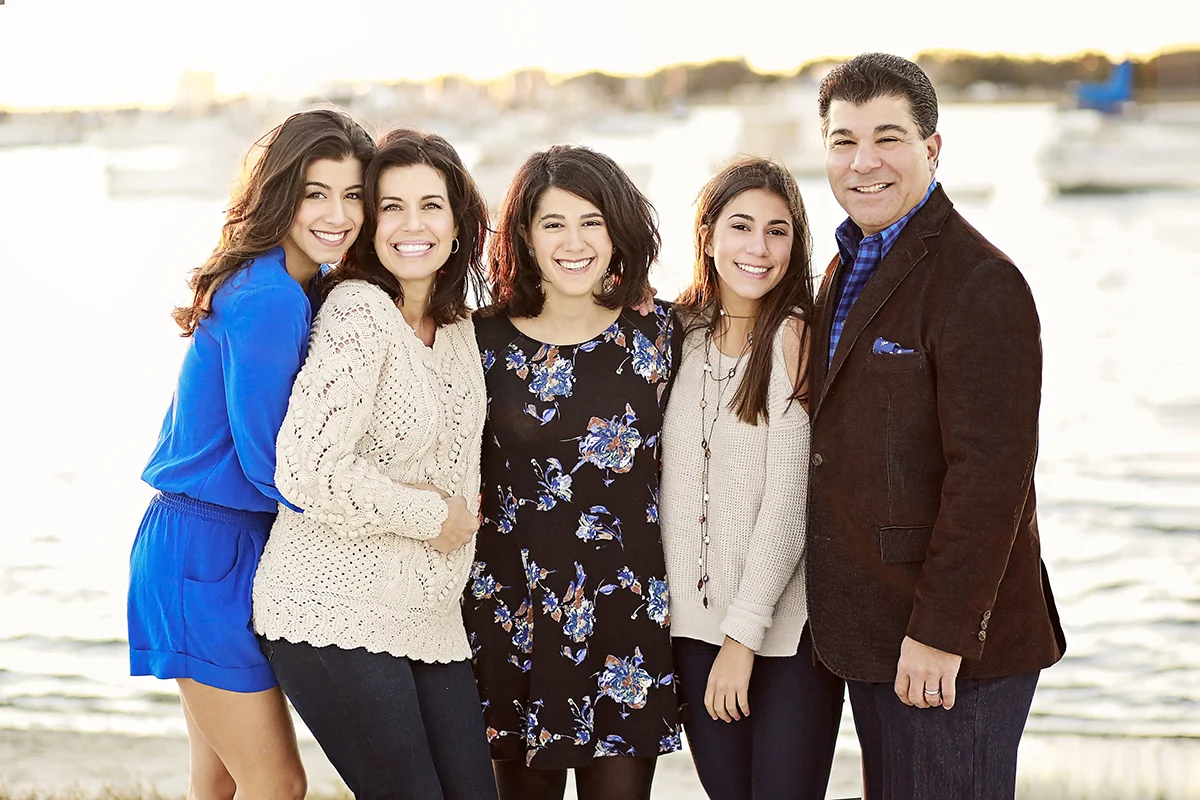
9. Plan ahead! If you know you'll be taking group photos with your family you'll want your outfits to "complement" each other but there is NO NEED for everyone to match! It's just too much! Have everyone stick to one "theme" and you're photos will be much more visually appealing. I absolutely LOVE what the Ramos family did last year for their cards. By sticking to blues, browns and cremes they created a visually appealing photo without being too "matchy-match"
10. Show some connection!
Most people pose for photos in awkward lines barely touching each other! No need to be so formal! Laugh, get in super close and wrap your arms around your family members! Be silly. Show some personality!
Here's a SUPER SIMPLE posing before and after that anyone can do!
While my "models" Natalia & Lindsay look fine in the first photo their dresses look a bit bulky from the side are adding pounds to their tiny bodies. Their body language also feels a bit more closed off b/c the focus is on their shoulders and not their faces.
In the second photo:
I moved them around so they were facing the camera. You can see how much slimmer they both look face on with their shoulders pulled back slightly?
I also took the shot horizontally instead of vertically.
Finally, they showed some love! Natalia's hand on Lindsay's shoulder makes the girls look a bit more connected and it feels more personal!
Before: Dresses look bulky, focus is on the outfits not their faces.

After: Horizontal crop, facing forward, shoulders back and more connection!
Remember, have fun! It's about creating memories with your loved ones - some of the best photos are the ones that are the least planned or expected!
Have an amazing holiday season!
Heidi
P.S. If you like these tips, be sure to check out my "last minute event tips" for even more guidance!
Want to learn more? Download my 10 Tips to Look Better in Photos! Click below!

How To Optimize Your Images for Google Search
When someone does a search on Google, you'll notice that there is a tab at the top with images related to the query that was entered.
So how do you get your images to show up there?
1. Save your image as a jpeg.
2. Make sure you image is appropriately sized for use on the web. There is no need to have a HUGE image. If you're a photographer, you can easily do this in Photoshop. My clients get the choice of downloading original & web-sized images. If neither of these are available to you go ahead and use a free site like compress.png.

A name like 0_123578.jpg means NOTHING to Google. Instead give your image a name that tells them what it is. Example: Tampa-Pet-Photographer.jpg.
3. Name your image.
Most cameras will download your image with a numbered filed name. Example: 0_12689.jpg. This doesn't tell Google a thing. You'll want to rename your image to something that makes sense like Tampa-Dog-Photographer.jpg or even Photographer-Kristin-Barnes.jpg.
Google is smart. But there are some things even Google can't figure out. Example. If you want to be found for "Tampa Dog Photographer" having an image
Guess what this image was named? That's right. Tampa-Pet-Photographer-06.
How do you change the name of your image? I use Adobe Bridge to batch rename for my clients, but if you don't have access to that, it's as simple as a right clicking on an image and "renaming" it!
I share a how-to in the video above.
4. Alt-Text
If you use a site like Squarespace, the image name will autofill into the title section. SS's word for "alt-text" If you are using a WP site, you may have to manually enter this.
How is alt-text used?
This is just another way to tell the viewer what the image is. If a site is slow to load or the images are not showing you'll see the "alt-text" instead. Side note: This is also a way for visually impaired people to know what an image is.
It's important that your alt-text accurately describes what's in your image. If you have a photo of a boat, don't name it miami-wedding-photographer.

Look what happened here?
When we did a google search for Tampa Pet Photographer, Kristin's photo and her image pulled up in Google Image Search.
Notice the name under the description matches the name we gave it on the computer before we even uploaded it to her website.
Easy, right?
I'll be back with more tips on getting your images to rank!

Optimize Your LinkedIn Profile
Tips to optimize your LinkedIn profile today!
1. Make a list of keywords that a potential client would use to find you.
As a general rule, these will be the same keywords that you use on your website for SEO purposes. LinkedIn has a “search” function similar to Google so people will “search” for professionals using similar terms.
2. Add these keywords to your profile in the following 5 areas:
The headline (use 2 or 3 keywords)
Your Current work experience.
Your Past Work Experience
The Summary
Your Skills Section
Important: Use the SAME keywords in ALL FIVE of the above places.
For example, if you are a life coach and your keyword is "coach." Put it in your past work history on EACH AND EVERY JOB that it could be relevant. "In college, I was a tutor/math coach to high school algebra students" instead of “tutored high school algebra students.” Using this approach you can help your LinkedIn search results while STILL BEING HONEST AND AUTHENTIC. Anyone who has tried to help a teen with math knows you are both a tutor AND a coach! Never, ever, ever should you make something up! But you absolutely should start thinking outside of the box. PAST work experience is relevant to LinkedIn b/c they take into consideration that you have done this job before.
3. Is your LinkedIn profile “click-worthy”?
Once a person LANDS on your LinkedIn profile, your summary is the most important part. Before that it's your headline and photo. Make them stand out from the crowd.
4. Choose the words you use in your headline wisely…make sure they give people a reason to want to click!
Do not use the term owner/founder in your title. It doesn’t help you. People want to know what you can do for THEM. Their initial interest will be sparked by what you can offer them not that you are the “founder” of the company
People scan headlines. For example, mine doesn't say "Owner of Heidi Hapanowicz Photography" it says "Headshot Photographer for Entrepreneurs” That way it is immediately obvious to someone (who hasn't even clicked on my profile) what I do in clear terms, that also includes my keywords.
It’s worth repeating, be sure your keywords are in your headline!
5. Have a professional profile photo taken.
Your profile is 11 times more likely to be clicked on with a photo. You’re a professional. Make sure your LinkedIn photo is as well.
Please, whatever you do, do NOT use a photo of yourself at a party with someone or something (especially a cocktail) cropped out of it. Make sure it is a clear, well lit and from the shoulders up only. You think this is obvious? Take a scan through LinkedIn photos one day and you’ll see just how many times this rule is broken.
6. Write in 1st Person
It's still a social network, so speak to directly to the person. Who is your audience? What are their problems? How you can help? A paragraph or two about who you are, what makes you unique and how you can help them? Don’t just add a resume; write as if you are talking to someone.
7. Include a "call-to-action" at the bottom of your summary.
Tell them what to do! For example: Visit my website to download my FREE guide “My Top 10 Tips for Looking Better in Photos….Instantly.” Your goal is to get potential clients to your website and ON YOUR EMAIL LIST and the best way to do that is to have a compelling reason (something FREE and of VALUE) that you can offer them once they get there. People are more likely to visit your site, call or even share a post when it’s a clearly written call-to-action.
8. Connect, connect, connect.
Your LinkedIn is not your Facebook so don't "guard" your connections. It's not personal. It's business. Accept people that want to connect.
LinkedIn’s search algorithm favors people who are already in your network so the more connections you have, the higher you’ll get in their search results. However, 500 is the LinkedIn “magic number” Once you reach 500 you’ll be looked at more favorably in their algorithm. See how fast you can get there! Allow LinkedIn to do the work for you by letting it pull up your email contacts and offer to connect with other members.
9. Write relevant articles and deliver valuable content.
Build relationships and make connections by creating valuable content and writing articles of interest. And always, always include a call-to-action at the bottom of your article! Let people know what you want them to do!
10. Add a visual component (like video) if you can.
Within the next 2 years video will account for almost 70 percent of consumer online traffic. If you don’t have it yet, it’s time to start thinking about it.
11. Ask your clients to give you testimonials on LinkedIn.
If you do this by email be sure to send them a clickable link to your profile so you they don’t have to search for you. Endorsements are great, but written straight from the heart testimonials by real people are king in the online world.
12. If you have a profile PLEASE be sure it’s complete and up-to-date.
LinkedIn has amazing SEO capabilities. Which means when someone does a search for your name in Google most likely your LinkedIn account will be shown on the first page of Google’s search results. This is an easy way of establishing credibility & influencing what people read about you online.
13. Claim your unique LinkedIn URL
Make sure it is super simple for people to find you on all social media by using the SAME unique URL on all platforms. Example: http://linkedIn/in/YOURNAME. This makes it easier for you to include it on your business cards and on all social media platforms.
14. Add a widget that links to your LinkedIn site on your website and in the signature line of your email.
Again, your goal is to have a consistent, professional brand all over the Internet.
Whatever you do, do NOT have a LinkedIn widget that links to an empty account. It sends the wrong message to people searching for you.
15. Social Proof.
Even if potential clients don’t find you ON LinkedIn it’s more than likely that they will research you there. Often one of the first things prospective customers do is search for your LinkedIn profile to confirm your credibility.
Remember; use LinkedIn to help you build your online brand.
16. Build your connections by joining Groups.
Join groups with people that have similar interests and engage with them by asking and answering questions.
17. Start a LinkedIn Group to get more followers.
Be sure to base the name of your group on one of the keywords you are looking to be found for.
18. Complete your profile
LinkedIn will also help you to grow your network by suggesting people for you to connect with based on your profile answers. Your college, former employers, etc.
19. Track your movement.
Unlike Google you can move to the top of LinkedIn almost immediately. If you make these changes you'll see yourself move to the top of the search results in just a few days!
20. Connect with ME!
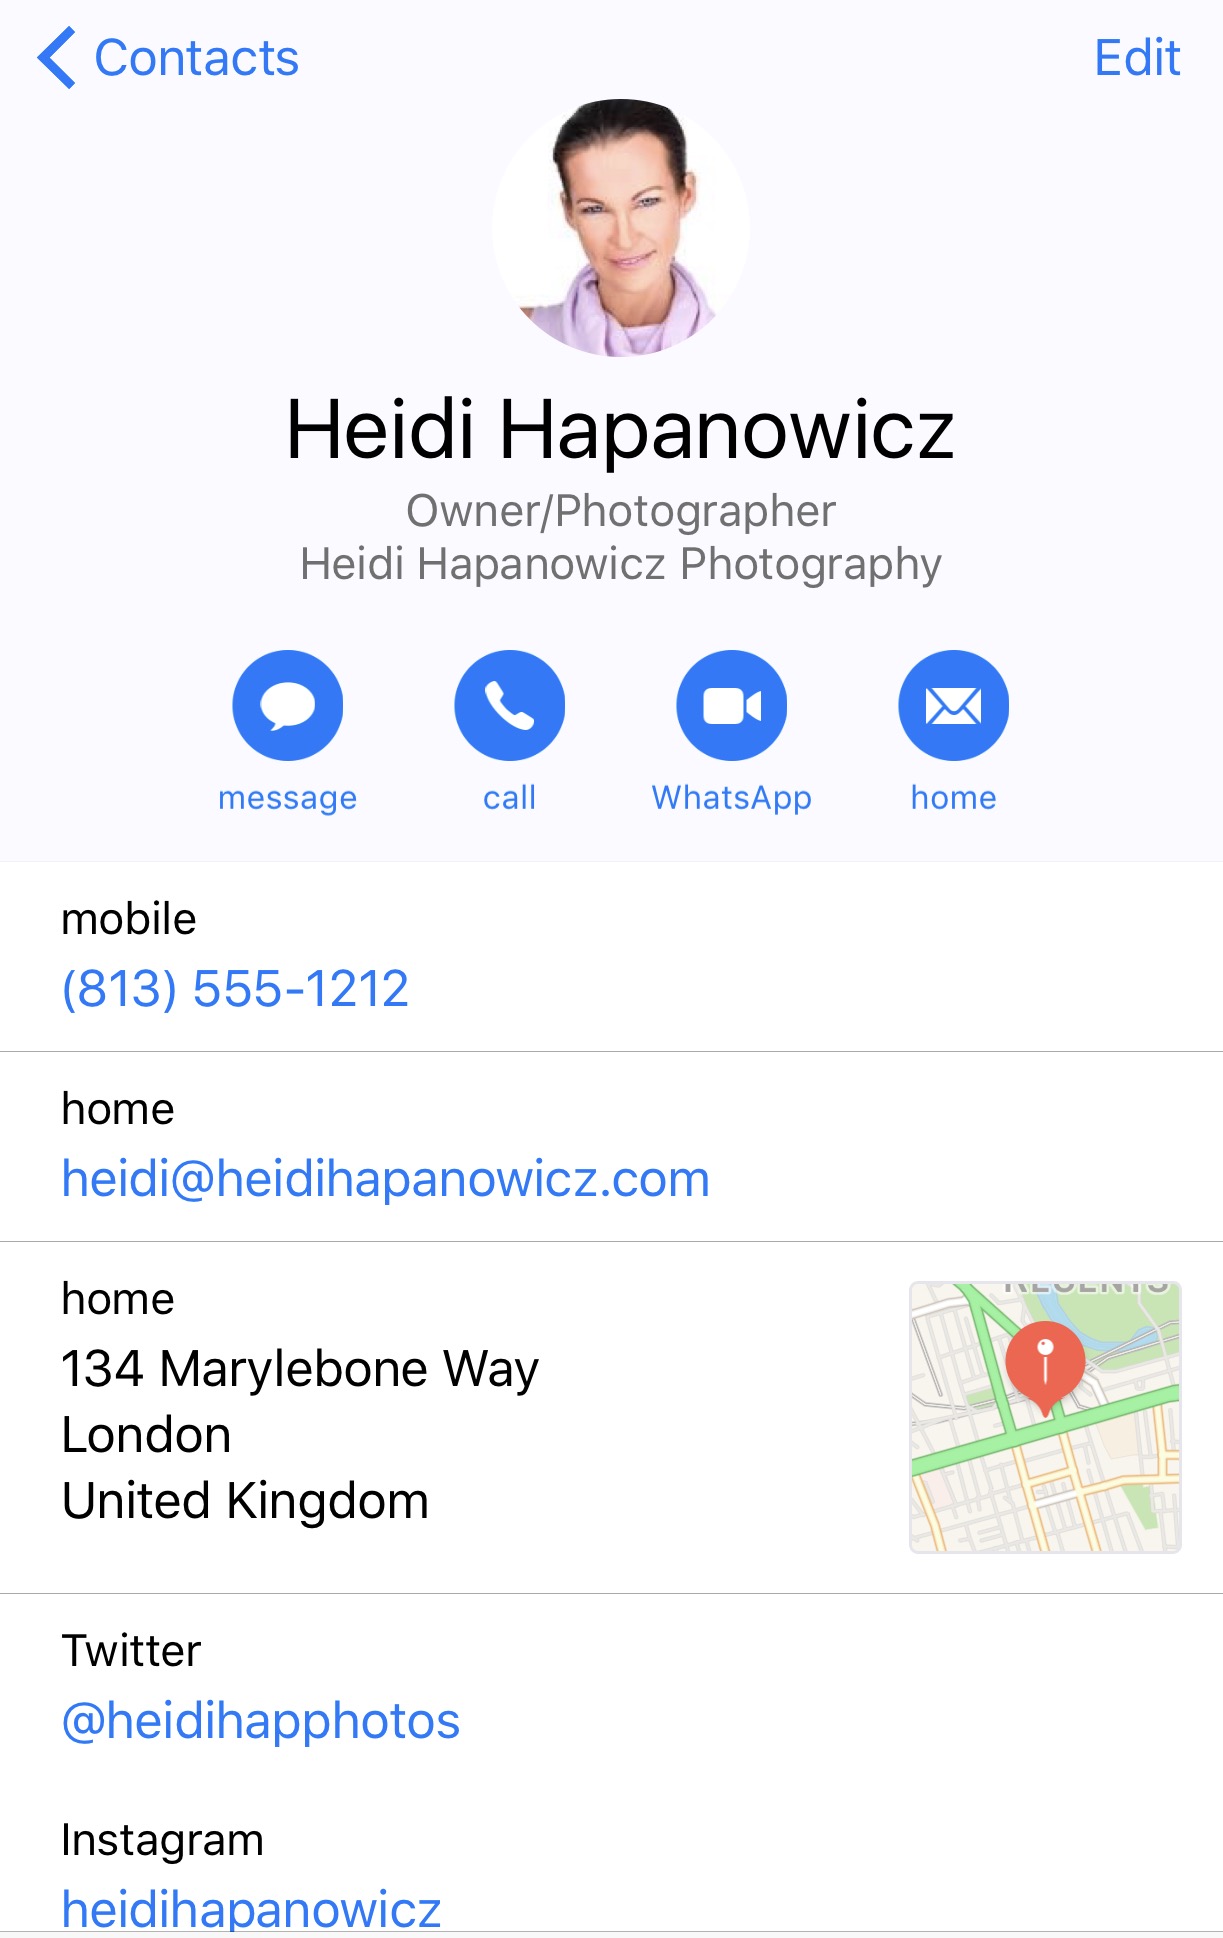
I’d love for you to connect with me on Linkedin. You can find my profile by clicking here: https://www.linkedin.com/in/heidihap.
I hope you found this helpful!
Want more updates from me?

How to Plan for a Personal Branding Photoshoot
How to Plan for a Personal Branding Photoshoot
People tell me all the time that photoshoots make them nervous. They don’t know what to expect. They’re not sure how to prepare. They don’t feel comfortable in front of the camera. So I created a process that walks my clients through EVERYTHING they need to know to pull off an amazing photoshoot. It takes the worry and stress out of the picture. They show up ready to have a good time and feeling like they’re in good hands.
I’m sharing a few of my best tips for how to plan YOUR next photoshoot like a boss. You GOT this.
Create a Mood Board
A mood board is a collection of images that represent your brand. When you create a moodboard and share it with your photographer, they will get a good feel for what you want your brand to look like, and how your photos will fit into the big picture.
Most people create a mood board on Pinterest, which can be easily shared with your photographer. You have the option to add notes to each image to specify what you like about it. The more your photographer knows about you and your brand upfront, the easier it will be for them to help you create images that match your brand.
Hire Pros
You need a good photographer. That should go without saying. As a general rule, you get what you pay for. Your best friend’s boyfriend’s old roommate who just started doing “photography on the side” *might* not deliver images you love. Same goes for hair and makeup. Hire professionals. Worth. Every. Penny.
Know Your Audience
If you don’t know the hopes and dreams of your audience—and their deepest, darkest fears—you haven’t done enough homework. Every good brand understands their ideal customer as though they were a best friend. What keeps your clients up at night? Where do they want to be in five years? What do they have to believe about themselves and the world in order to buy your products or service? Do in-depth research to discover these details about your audience, and you’ll be able to connect with them every step of the way.
“Talk” to Your Audience
Once you truly know and understand your audience, consider how you want to communicate with them—and that means through more than just words. People process images 60,000 times faster than words. So create photos that do more than just make you LOOK good. Show emotion in your photos. Laugh. Look confident. Think about how you want to make people FEEL. Channel that energy during your photoshoot.
Create Images for the Web
Make sure your photographer is familiar with taking photos for the web. Be sure they take lots of horizontal photos, which are ideal for websites. Images with plenty of negative space are perfect because you can add text later. Think about how the images will stretch across your website, and in what ways you’ll use them for different promotions. Add some examples from your favorite brands to your mood board so your photographer knows what you’re looking for.
Use Props to Tell a Story
Think about the items you use while working. What would your audience imagine you doing behind the scenes? Give them a glimpse in your photos. If you’re always on your laptop while sipping a latte, bring your computer and favorite mug (or better yet, one with your brand colors!). If you couldn’t live without your books, grab a stack of your favorite titles. If celebrity gossip is your current obsession and you LOVE to drop deets about your idols in your content, bring your latest issue of Star Magazine. Let your props help tell the story about who you are as much as what you do. Infusing your personality into your photos will attract new readers who just GET you.
As you can see, a personal branding photoshoot is about so much more than how you look. How you feel—and how you make your audience feel is even more important. The tips above will help you create a deeper connection to your audience through your personal branding photography. Now go get ‘em!
Need more help? Check out my course “Plan Your Personal Brand Shoot” which gives you my exact system for planning your upcoming photoshoot!
Simple Headshot Setup
Creating a killer headshot does NOT have to be complicated. All you need a bit of sunlight & a black backdrop or v-flat if you have one.
You (or your model) should also wear black for a super sleek and elegant look that can be photographed absolutely anywhere..even in a tiny apartment or garage.
I use 8 foot matte black art boards that I purchase at Blick Art Store. If I need to extend the background for a banner or header it's super simple in Photoshop. This gives me plenty of room to add text with a call to action on the side!
This black on black look is hands down, my favorite headshot look these days!

"The Business Contact"
Forget business CARDS - I prefer "The Business Contact"
One of my favorite tricks is to create a contact of MYSELF in my iPhone.
When I meet people at an event, instead of sharing a business CARD (which often ends up lost in the bottom of someone's goodie bag or purse) I simply share my "business contact" that way it's already uploaded into their phone, has my photo, my social media handles, my email and a little bio about what I do!
It saves someone trying to balance a cocktail on their knee while they input all of your information!
Plus, you'll have to get THEIR number to share it - so you can send them a quick personal text share your contact and VOILA! You'll be right at their fingertips!

Squarespace SEO Tips
Quick and easy SEO tips for your Squarespace site.
This is a super quick blog post that I'm writing in response to the requests I've received to share my Squarepace SEO tips. To be clear, I am NOT an SEO expert - just sharing what has worked for me in my business!
I’m going to assume that you have a general understanding of SEO & have done your keyword research as that's not something I'll be addressing here. :)
Again, this isn't meant to be a complete SEO roadmap....just some starter steps in the right direction!
Let's get started!
1. Rename your images before uploading. Before you even log into Squarespace, I suggest your re-name all of your images using the keywords you will be using for each page. Example: acting-headshot.jpg and NOT 459202.jpg.
2. Get a Google+ page. If you do not have a Google+ business page – run don’t walk – and create one NOW. This is especially important for local search results. Example: You are a wedding photographer in Boston or a dog walking company in Detroit. You will need to verify a physical address for your business. If you do not have one & don’t want to use your home address, go ahead and rent a PO Box at a UPS store or something similar.
When creating a page in SS:
3. Use custom page titles. Use custom page titles by changing the URL slug to something that contains your keyword. (To do this: Click on the little “gear” to configure page. Enter your unique page name under the description section. )
4. Create a page description. While you’re there, be sure to make good use of the description section by filling it in completely – use an interesting, keyword filled summary of your page. Be sure to write something unique for each page – don’t just copy and paste the same thing throughout your site!
When inserting an image on a page:
5. File name. After uploading your photo, fill in the file name section! This is the Squarespace version of an alt tag. It says "optional" but you should NOT leave it blank. If you do not want this info to show on your image just click on the drop down menu and set it to “do not display caption.”
When creating a blog page:
6. Configure the blog page itself as you would any other page by clicking on the little “gear” and filling in the information.
7. Create a description of your blog.
8. Create a unique URL slug for the blog.
When creating individual blog posts:
Post Title: Create a keyword rich title. In my experience, this title is what will show up alongside your blog image in the google search results.
Options Tab: Create a unique “post url” for your blog.
Location Tab: to enter the location of your business. This should be the SAME location you registered with Google+.
Social Tab: Be sure to have your social media accounts connected and have SS autopost your blogs to your pages.
When creating a gallery:
Configure the gallery page just as you would any other page by giving it a unique url slug.
Create a description for the gallery.
Click thru the content, options, location and social tabs and be sure to fill in as much info as possible.
Title each image. Again, the title of each image is very important here because this is what will show up in Google images! I’ve seen these show up in search in less than one week.
When writing content:
Heading 1 titles should be filled with keywords.
Create unique, helpful content for people that includes links to pages both within your site AND to outside pages.
That should be enough to get you started! I hope this was helpful! I'm putting together a lot more tips so be sure to get on my mailing list and be the first to know when they are ready!
Be Your Own Media Company
Document, Don’t Create—Be Your Own Media Company
Gary Vaynerchuk (or GaryVee as he is affectionately known) has it all figured out. He lives his advice. He shows up on social media every day to rally his people. They hang on his every word. His content reaches the far ends of the web, but not because he and his team spend hours every day coming up with content. It comes down to one simple piece of advice he gives: Document, don’t create.
If the idea of writing blogs, emails, and content for five social media channels, plus shooting videos for YouTube, Facebook, Instagram, and SnapChat makes you want to crawl into a hole and never come out, relax. That’s a TERRIBLE plan (even though it seems like that’s what everyone ELSE is doing). If you can shift your mindset—and content plan—from creation to documentation, you’ll save HEAPS of time and finally feel GOOD about showing up online.
YOU Are the Production Company
Forget about hiring a film crew and writers to produce your videos. Put those thousands of dollars back into your pocket and take out your phone. You don’t need a script. You don’t need an elaborate setup. You don’t need to spend hours editing the reel. Just press that big red record button and tell us how you really feel. Show us what you’re up to. Give us a glimpse of your world. And then do it again. And again. And again.
Now Is the Time
Instagram Stories and Facebook Lives are blowing UP right now. At the touch of a button, you can get in front of more people than ever when you post a live video to these two channels. While your competition hesitates to take the leap, you’ll be basking in the attention of ideal clients who might have never given you a second thought—until now. Sure, the first few videos might make you shake in your boots, but I promise, you’ll get comfortable much sooner than you think. So get to it, will ya? Ready, set, GO!
But What Can I Possibly Say?
Don’t think about it too much. Just do you. Got a big project you’re working on? Take a behind-the-scenes video to show your audience what you’re up to. Stuck on something? Let them know about it and ask for their help. You’ll get tons of engagement and possibly your next big idea! Feeling passionate about something that’s happening in the world? Let your people know what makes you tick! Can’t think of anything to shoot? Head to your favorite coffee shop or restaurant and order your favorite beverage or meal. Take a video on the spot and talk about why you love it so much. Done! Whatever you do, don’t overthink it. You got this.
Get Inspired
Gary Vee’s book, Crush It: Why Now Is the Time to Cash in on Your Passion, is just the kick in the pants you need to get started. He highlights people who are killing it with their personal brands. You’ll get loads of ideas and motivation from this book. I highly recommend it.
My Secret to Finding Glamorous Photoshoot Locations!

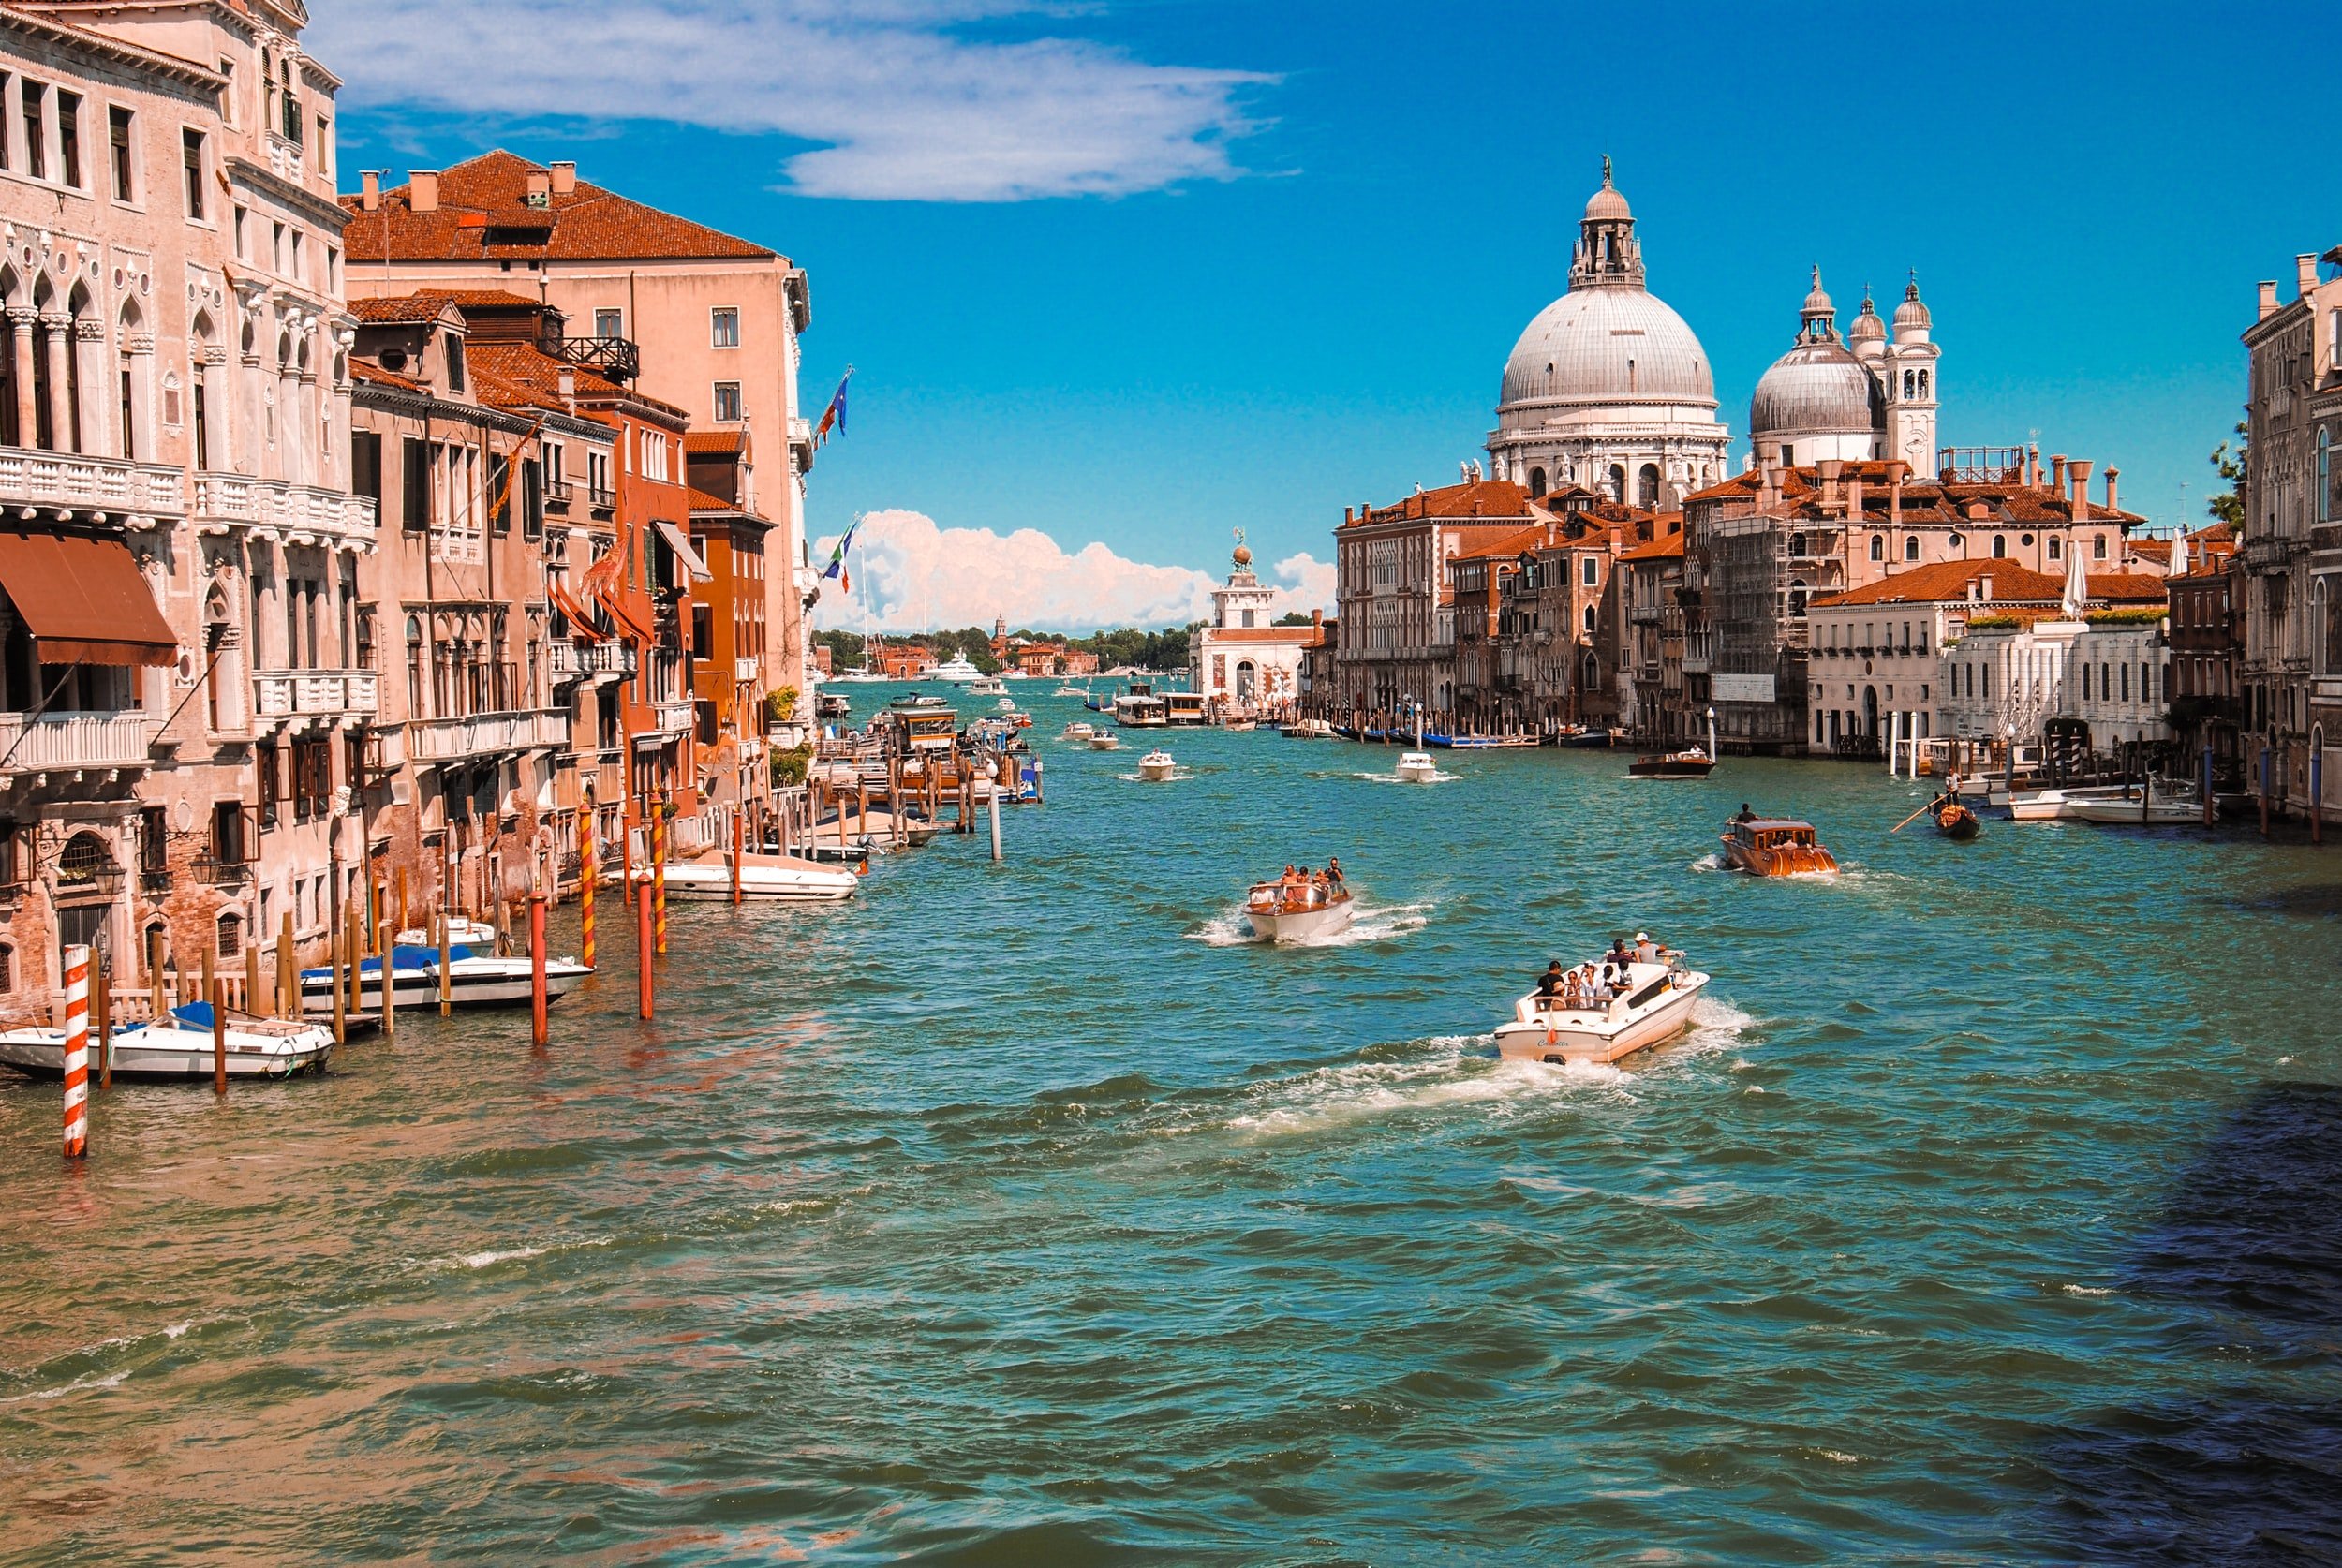
I admit it. I LOVE luxury locations. When I arrive in a new city, I can't wait to push my way past the postcards, refrigerator magnets, and t-shirts to discover the hidden little gems most tourists never see.
If you're really lucky, you'll know someone well-connected, like my dear friend, Parm, who with a simple text, can have you seated next to David Beckham at the latest London hotspot or tell you where the "secret doorway" is to a magical little garden in Paris where, it's been rumored, George had his first date with Amal.
But, what if your sights are set on a dreamy photoshoot in a city halfway across the world but you don't know a single soul?
How can you avoid fanny-pack wearing tourists photo-bombing your shoot and head somewhere a little more upscale? What if you want Conde Nast but everything around you is Cheesecake factory?
Today, I'm sharing my stupid-simple trick for finding the most incredible locations for photo shoots! And, if you're lucky, a little celeb spotting on the side!
Step 1: Get Inspired on Instagram.
Fill up your feed with fashion & travel bloggers, photographers, and your favorite celebrities. The kind of people who are jet-setting around the world and hanging at the swankiest parties!
I was recently following one of my favorite bloggers when I caught sight of this gorgeous Prosecco toast! This place is DREAMY and it looks perfect for an upcoming shoot I'm planning for a new client!
So, how do I find out exactly where she is?
Step 2. Click on the location that your favorite Instagram blogger has checked into!

Step 3. It will take you to a large view map! I can see it's in Italy! Yay!
I can also see photographs of other people who have checked into this same location. Hint: This is a great way to find the "must have shots" before you even arrive!
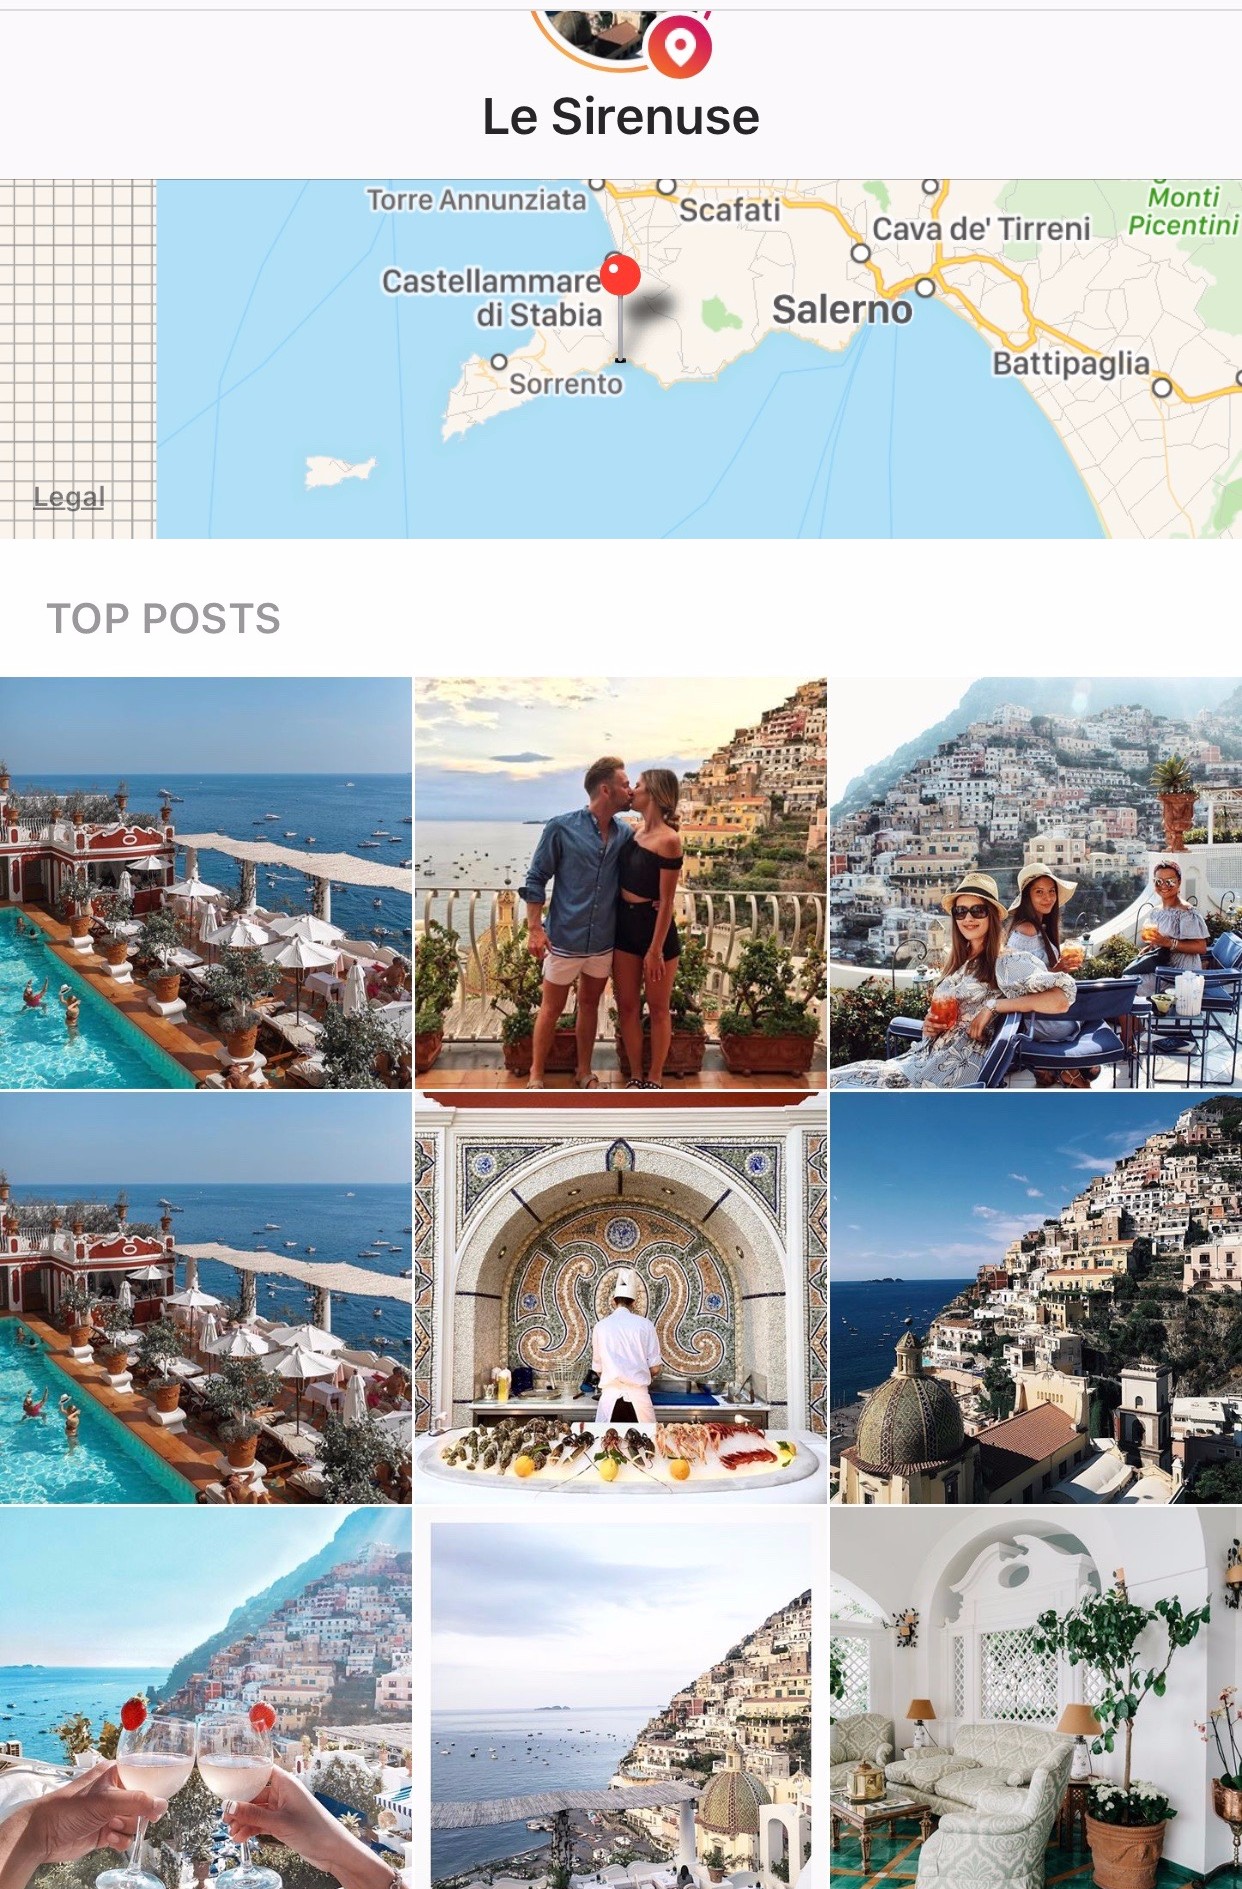
Step 4: Click on the pin📍 on the map and it will give you the EXACT address!

Step 5. Next, click on the little heart ♡ on the bottom of your screen, it will turn red ❤️ and will be saved as a "favorite place" in the map section on your phone!

Step 6. When you arrive at your hotel, open your "map app" and give the address to an Uber driver!

VOILA!
You've saved yourself DAYS of location hunting! You can plan the PERFECT shoot, right down to the location, without ever having to leave your house!
Love tips like these? Want to learn more? My Plan Your Personal Brand Shoot is the perfect way to learn my entire step-by-step system!
